Close-up And Macro Photography
Shorter days and bad weather don’t mean we have to pack up our camera for the winter, IOP Distinction Student Susan Dobbs celebrates the potential of macro as a way to see our world with a whole new perspective…
One of the pleasures of close up and macro photography is the different, texture and details given to normal subjects giving us a whole new perspective on them. You don’t need to wait for suitable weather, find a model or need a great deal of space for this type of photography and there isn’t a shortage of everyday items which will make great subjects. Pencils, a steaming cup of coffee, an old watch, flowers, fruit, keys, cutlery, the list is limitless!
You might be thinking that you need a special lens for this type of photography, but any lens can be used to take a close-up image, and most lenses can be adapted for macro if you don’t have a dedicated macro lens, but before we go any further let me explain the difference between close up and macro photography.
Close-Up Photography
The image of the object is taken at a close-up range and normally fills the frame. The subject is isolated from the background, and usually, only part of the subject is photographed. You don’t need a specialised camera for close-photography, and both prime and zoom lenses work well. Lenses have different focal lengths some allowing you to get closer to the subject than others; if you have several lenses, it’s worth trying them all to find the one which works best for you.
Macro Photography
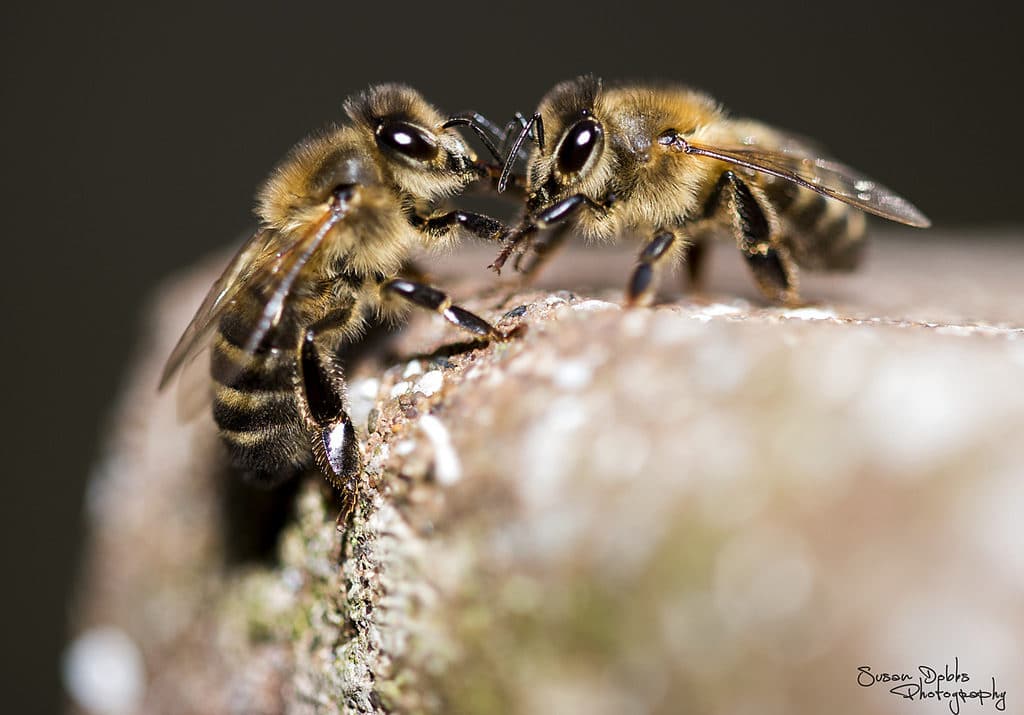
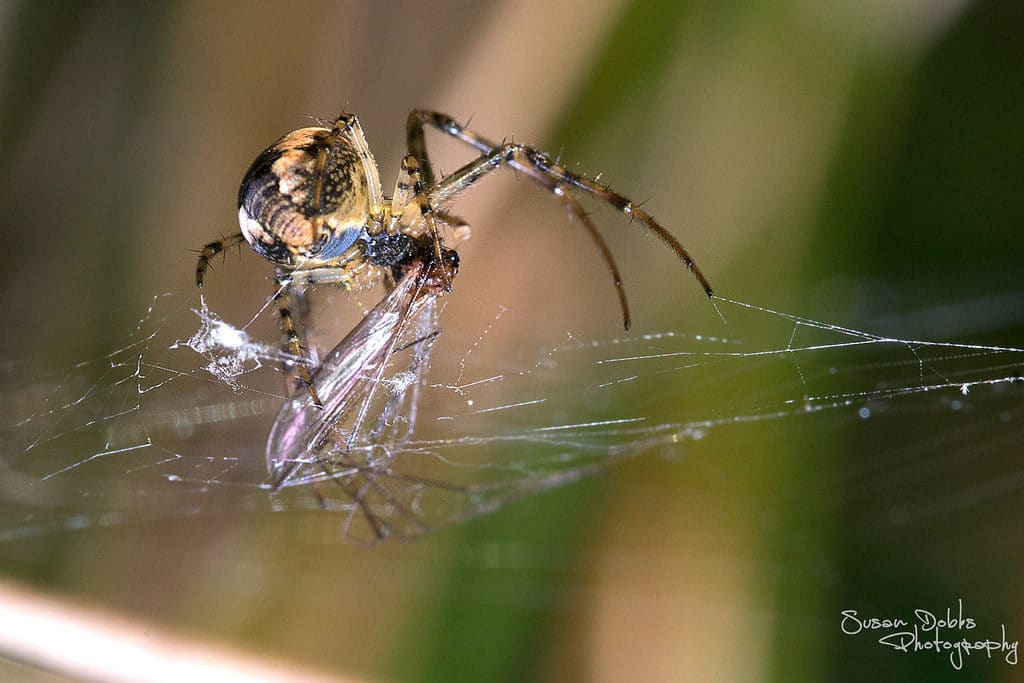
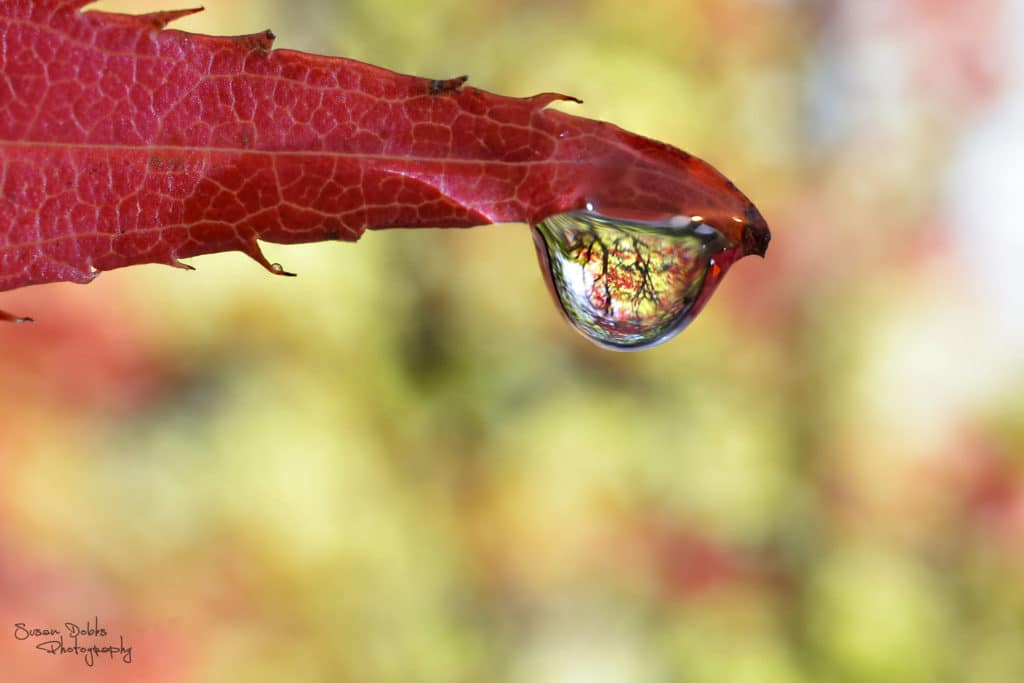
This is ‘extreme’ close up photography, usually of tiny subjects. The size of the subject in the photo is larger than its life size and images normally show very fine details of the subject. Macro is shot in a magnification of at least 1:1, at this ratio the size of the image on the camera, is the same as the subject size.
There are dedicated macro lenses available, but most lenses can be adapted fairly cheaply using the following items:
Close-Up filters: these screw on the end of the lens acting as a magnifying lens.
Reversing rings: these enable the lens to be mounted backwards on the camera body turning it into a close-up lens.
Extension Tubes: these fit between the lens and the camera body extending the focal length of the lens.
One important caveat when using any of these macro accessories, is they affect the light transmission into the camera so that the exposure time will be increased by up to one exposure stop or more. So, this is something to consider at the time if the light is already limited and you’re not using a tripod to keep the camera and lens steady.
Camera Settings And Other Equipment
When taking close up and macro images, it’s important to keep the camera very still to ensure the image is in focus, this is best achieved using a tripod. If your lens has image stabilisation, then turn this off when using a tripod as it can result in camera shake in the image if left on.
To trigger the camera, either a quick release cable, remote control or in camera timer can be used. I find a remote control or in camera timer set to 10 seconds most effective as they allow the for camera to settle before the image is taken. If you don’t have access to a tripod, try taking the image in burst mode on your camera as the second and third images are often sharper than the first.
Focusing for close up and macro photography is best achieved using manual focus, this also has the advantage of giving a closer focusing distance. Most DSLR’s have the function to zoom in live view, some up to a magnification of x 10 or more, this is an excellent tool to zoom in on a specific area in the image to make sure it’s in focus. If you are using auto-focus, then consider using single point focus and ensure this is placed on the area of the subject to which you are drawing the eye’s attention.
Full manual or aperture priority is suitable for close-up and macro photography although full manual gives you full creative control. In both types of photography, a shallow depth of field is needed to isolate the subject from other objects in the frame/ background; this is achieved by using a wide-open aperture using a low f-number such as 4.5 or lower.
Experiment with the depth of field until you are happy with the results, bear in mind that a macro lens used at f-2.8 gives an extremely shallow depth of field which can be challenging to work with for macro photography beginners so it may be worthwhile considering a higher f-number initially.
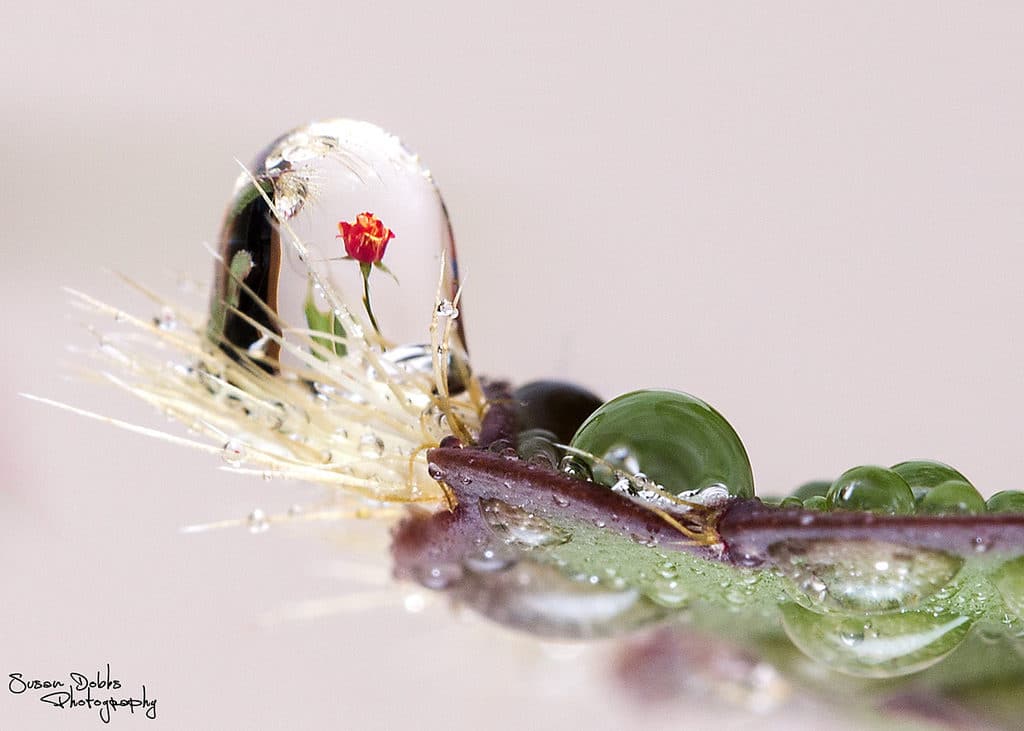
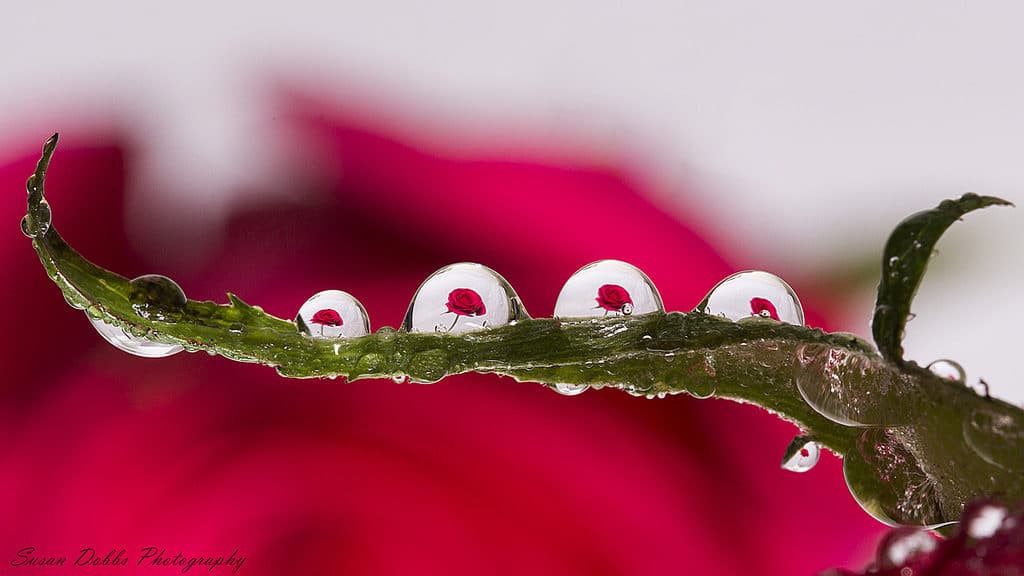
Using a tripod will allow for a slower shutter speed enabling an ISO of 100 – 200 to be used this will keep noise levels in the image to a minimum, although some cameras are capable handling noise well at higher ISO settings. If you are photographing a moving subject such as water droplets, then a faster shutter speed is important, this can be achieved by increasing the ISO in low light situations although this may have an impact on your final image. Alternatively, you can introduce more light into the set-up or consider using a flash.
Composition
You can bring a lot of creativity and artistic flair to your close up and macro images, but as with all types of photography there are some basic rules to follow:
Focus towards the front of the frame ensuring the focus point is pin sharp.
Use the rule of thirds when composing, placing the point of interest on one of the intersecting lines.
With close up photography ensure that the frame is filled with the subject.
Leading lines are essential in some macro images, e.g. a falling water droplet will need space in the frame below the drop.
A clean background will free the image from unwanted distraction.
A shallow depth of field will bring the focus of attention to the subject.
A different perspective can bring an extra dimension to the image, so experiment with different angles and points of view.
Natural light is ideal for close and macro when setting up make use of light coming in from a window, but be aware of the bright sun as this can cast harsh/hard shadows which can affect the clarity of the details and detract from the subject.
If some areas are in shadow, then use a piece of white paper or a reflector to bounce light back onto the subject to help open up the shadows and draw out the details.
Consider placing a light underneath the subject you are photographing; this works particularly well for sliced pieces of fruit.
If using a flash to freeze motion, e.g. with droplet photography, then try to diffuse the light from it by pointing it up at the ceiling, this will soften the light helping to avoid harsh shadows.
Most importantly of all experiment and have fun, close up and macro photography is a lot of fun, very rewarding and can be highly addictive!
Photographs by Susan Dobbs. See more of her work here.
Find out more about our courses here
Download a Free Prospectus
Get your Free Guide To Composition here