IOP® Tutor Phil Jones shares his Introduction To Wildlife Photography and some of his stunning wildlife imagery
Phil has produced this quick-start guide is intended to help the budding wildlife photographer in starting out in this challenging genre.
1. Know your equipment
It is very important to know how your camera, lenses and other equipment work.
For example, by “knowing” your camera you should be able to make adjustments to aperture, shutter speed, focus points and focusing mode without taking your eyes away from the viewfinder, or off the subject.
Achieving the knowledge to change settings in this way will mean that you are always ready for that action shot, which may only last 5 seconds.
Know your lens and how to use it optimally. Understand your lens characteristics and how to work around any shortcomings. e.g. The Canon 100-400L lens (the old Mark 1 version) was a little soft at f5.6 at 400mm. but from f7.1 it was very sharp. Many other lenses and makes of lenses have shortcomings so get to know them and how to work around them.
2. Passion, Patience and Planning
Study your subject and have a passion for it. It is passion that produces the best photographs.
Set yourself a project by choosing a particular subject or species and get to know it.
Take time to study the animal or bird. Study their habitat and behaviour.
It is so important to know the subject you are going to photograph. This will enable you to anticipate what it is likely to do next, so that you can be ready when the action is about to take place.
Your images will stand out when you can capture its behaviour and character.
In wildlife photography anything can happen at any time but it rarely happens at the precise time that you are passing a specific spot.
Occasionally you are lucky but most of the time you make your own luck.
To succeed in this genre and to get that ‘wow’ shot, you will have to learn to be very patient, returning to the same spot or hide, time and time again.
Patience is not a virtue it is absolutely essential. Wild animals are not trained so you will have to sit and wait most of the time, sometimes for hours or days before the creature will present you with that perfect shot.
But while you are waiting, get creative and take some other shots, looking at things like composition, portrait and small detail. You are out there so enjoy it and be one with nature.
3. Practice
The old adage prevails, practice makes perfect. The more you practise the better you will become in gaining consistent results. Success breeds confidence and the more confident you are in photographing your subject, the better your results will become generally.
4. Enjoy the experience
It is very important to go out and enjoy the moment and the experience. Become passionate about the amazing art of photography. Work on it to create both stunning and beautiful images that tell a story to the viewer or get him/her to ask a question about the animal or bird that you are photographing.
What makes a successful wildlife photograph?
Composition
Having assumed that the photographer has a thorough understanding of exposure and use of the histogram to ascertain the required exposure, the next very important issue is composition.
Knowing and understanding the rules of composition which apply to all genres of photography is essential.
In wildlife photography the “rule of thirds” is important to giving a balanced photograph, particularly where there is likelihood of the animal or bird making a sudden movement, or where the creature is already moving.
EXAMPLE 1 – Long Tailed Tit On Post
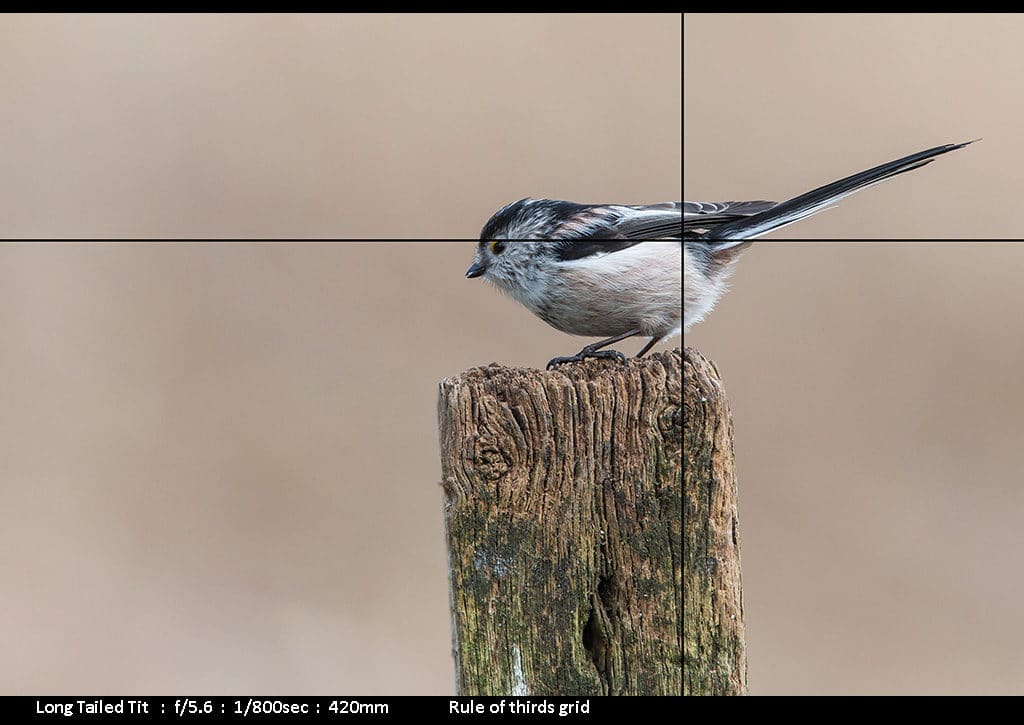
Given a situation whereby the animal or bird is likely to move away in a particular direction, try to leave space in the frame in front of the creature so creating an illusion of giving it somewhere to go.
Good composition is so important for the overall visual effect. The image becomes more than just a record shot.
Eye contact with the subject adds life to the image, particularly where there are catchlights in the eyes too.
Head angle in relation to the camera can be so important. The head needs to be at least perpendicular to the camera and ideally turned a few degrees towards the viewer.
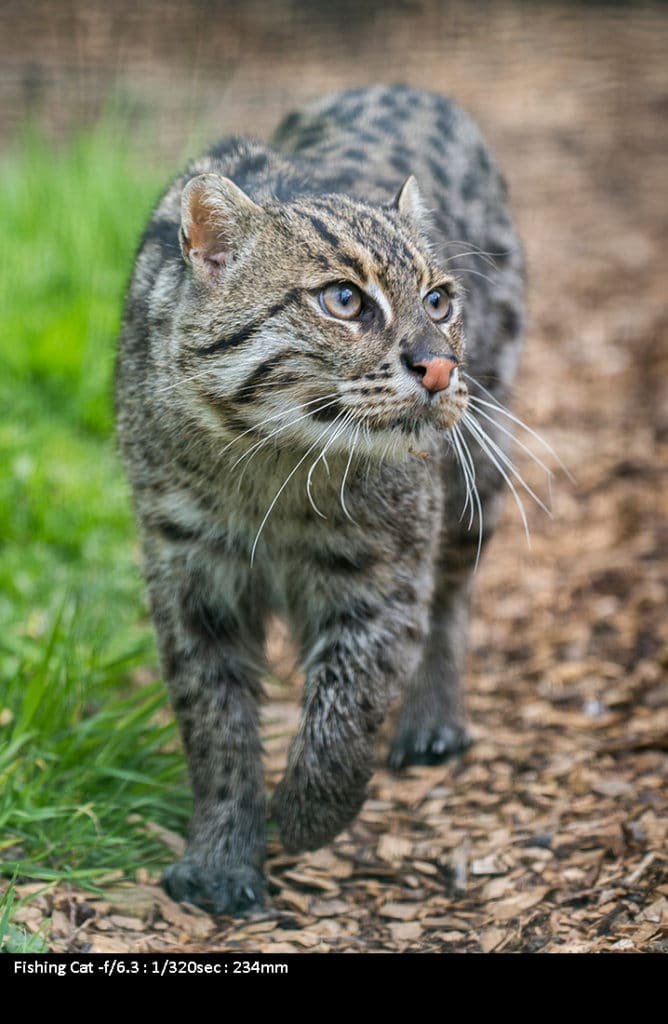
Sometimes opportunities arise to obtain good images where the creature is too busy doing something else to be concerned about you and you will not get eye contact, but still get a great shot. Rules are made to be broken so experiment.
EXAMPLE 2 – Fishing Cat
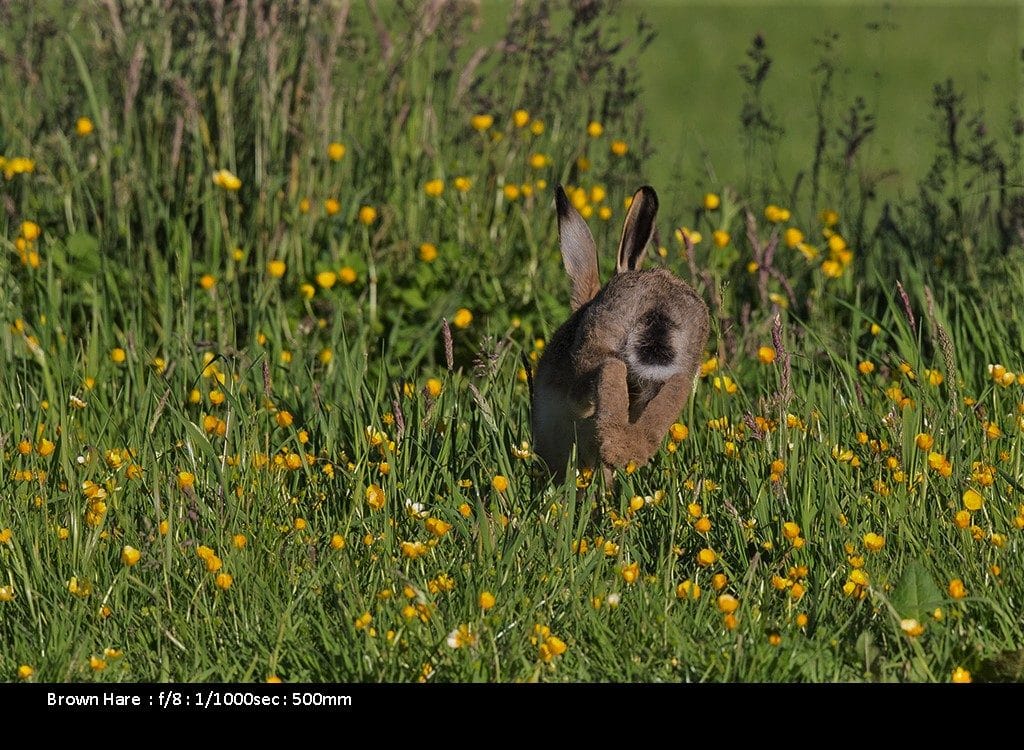
EXAMPLE 3 – Brown Hare (Back View)
There are no hard-and-fast rules in wildlife photography. After all, it is an art form and rules tend to stifle creativity, but by learning a number of proven tips and tricks you can improve your pictures almost overnight.
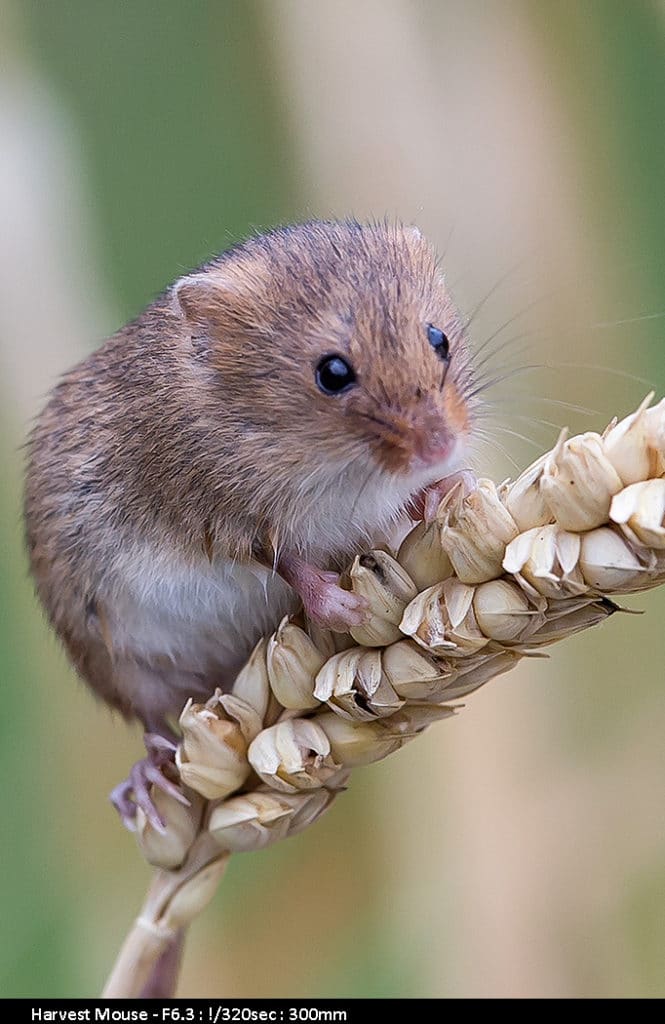
Firstly, try to keep each image simple by a process of subtraction when you are looking through the viewfinder to compose the shot. Very often less is more in the long run.
Simple images tend to have greater impact on the viewer than ones that are full of unwanted distractions. Bright bits at the edges and corners of images are particularly annoying and tend to lead the viewer’s eye away from the main attraction almost immediately.
Aim to present a clear message. To achieve that you need to remove all the superfluous unwanted and unnecessary items and distractions and anything else that might compete with your main subject. So the golden rule is simplicity: less is more.
Take a good look at what you are trying to convey in the photograph and then go through a process of elimination forcing yourself to remove anything that isn’t relevant to your vision.
Moving the camera just an inch to the left, right, up or down can remove unwanted clutter from the image. Awareness of the principle can make such difference to the final result.
EXAMPLE 4 – Harvest Mouse
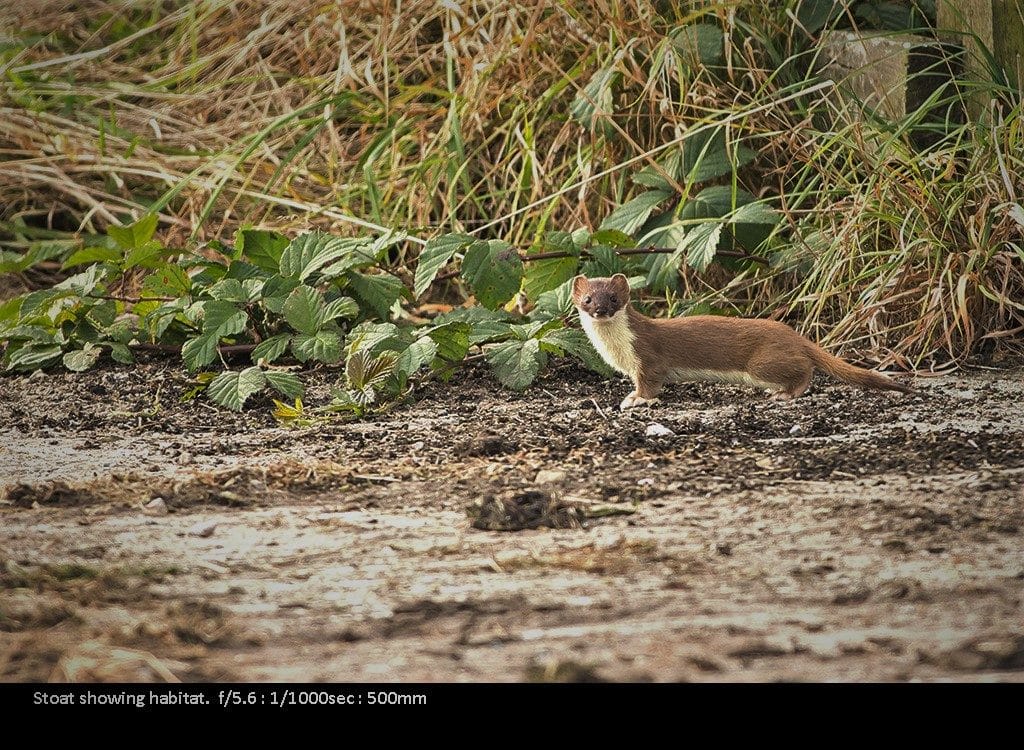
But again, don’t get too hung up on the simplicity rule. There will be occasions when you want to show an animal in its habitat rather than in isolation.
After all rules are there to be broken and sometimes a little extra detail can make such a difference. A good photograph can become a great one. It’s all about fine-tuning and attention to detail.
EXAMPLE 5 – Stoat In Habitat
Use the Light and work it to your advantage.
As a photographer you will already be aware of the term “the hours of golden light”, particularly if you have done landscape work.
It applies equally so to wildlife work and means early morning starts and late afternoon/evening excursions to make the most of late sunshine when the sun is low in the sky.
This is particularly relevant in summer because between 11.00am and 4.00pm the light can be particularly harsh creating blown highlights and deep shadows.
It becomes especially evident whilst photographing abroad whereas in the UK with so many cloudier days in the year it is not so relevant and you can shoot all day.
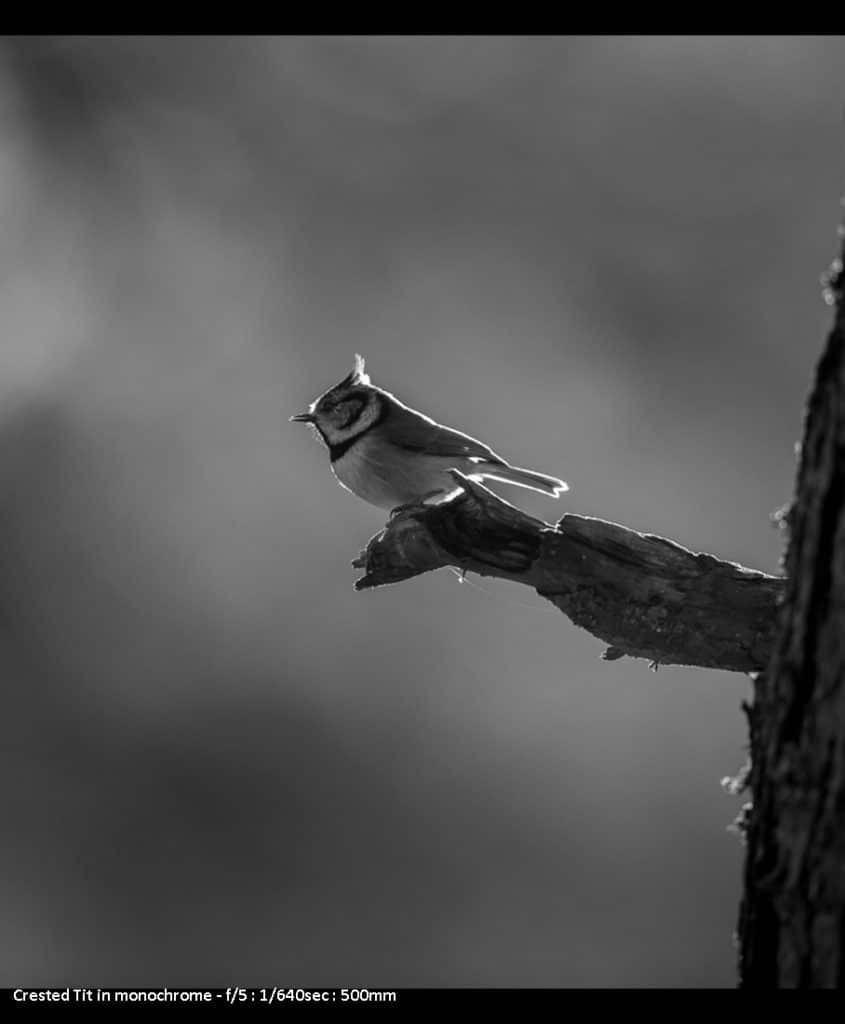
Cloud cover tends to give much softer diffused lighting conditions so use those conditions to your advantage. Don’t be afraid to consider monochrome work on some of the very dull days. Some excellent photographs can be achieved.
EXAMPLE 6 – B&W – Crested Tit
You do need to learn how to use various lighting conditions to your advantage.
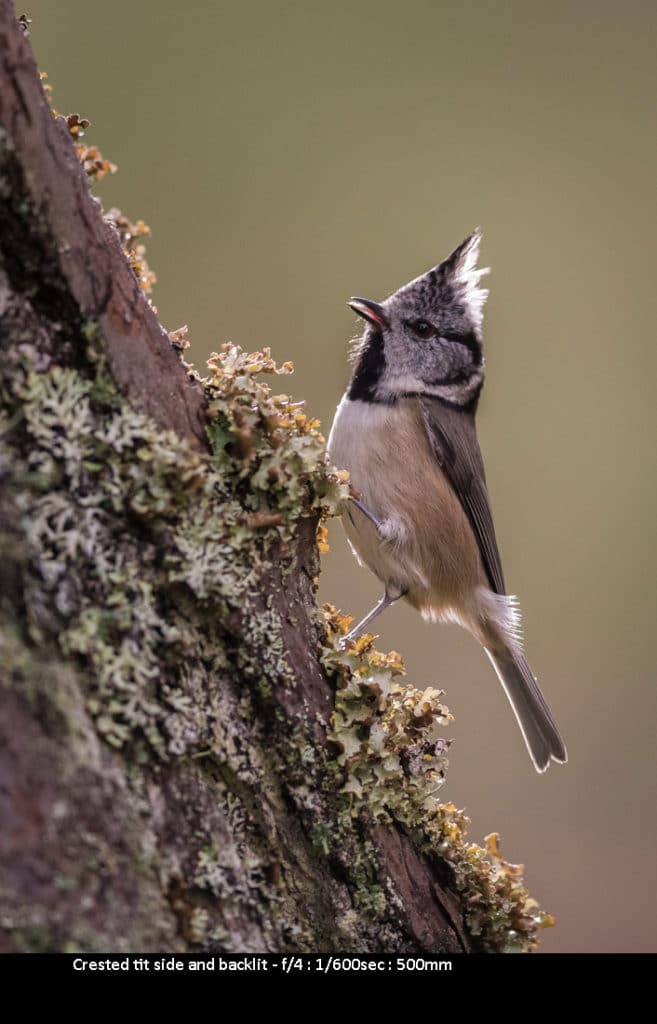
Inevitably in the field you will find yourself in conditions where light is less than ideal or where the light is good but from the wrong direction.
On many occasions you will not be in a position to move particularly if you are in a hide, or movement is restricted by some other external factor. By using back or side lighting to its full advantage you can achieve some wonderful moody shots.
EXAMPLE 6A – Crested Tit Side & Backlit
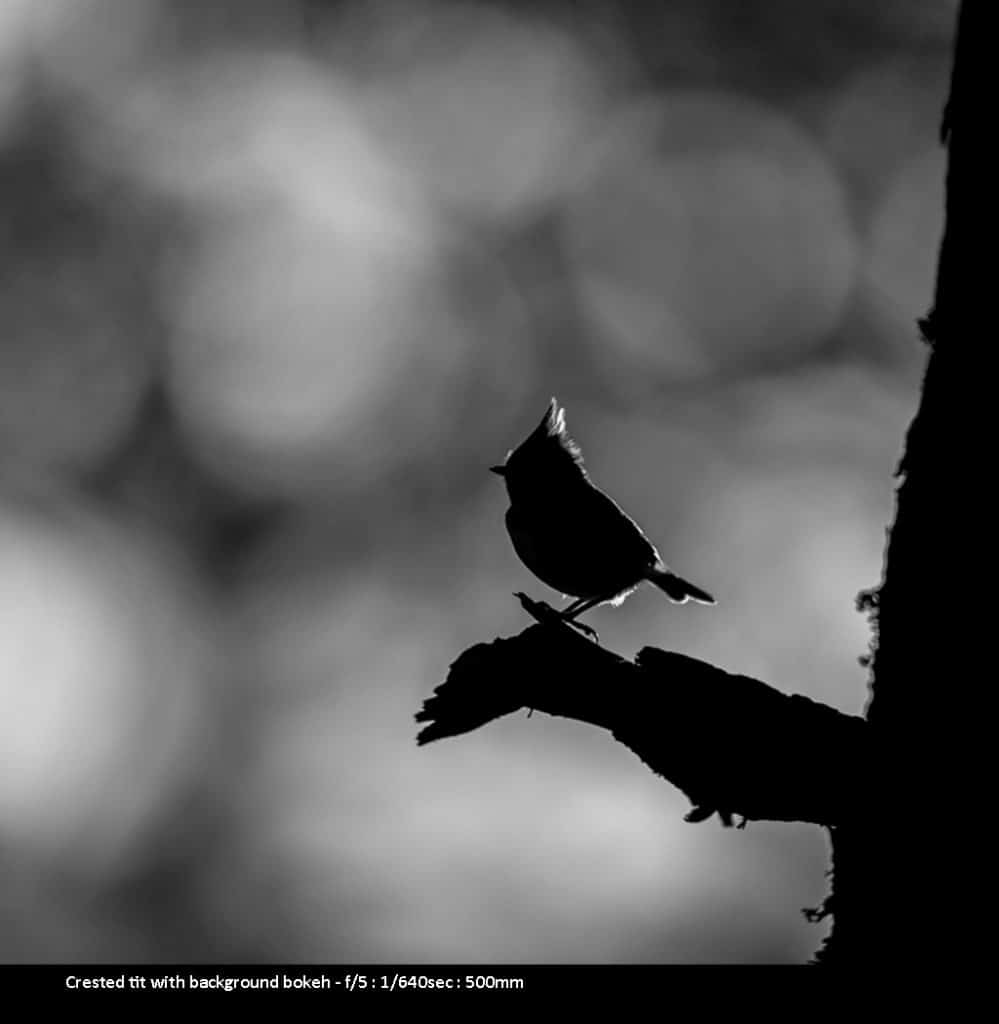
Shooting directly into the light can be very tricky but by knowing your gear you can overcome some of the problems and achieve very “arty” pieces of work with wonderful bokeh effects.
Again don’t be afraid to experiment and purposely under expose by two three or even four stops to exaggerate and create stunning silhouettes.
EXAMPLE 7 – Bokeh – Crested Tit
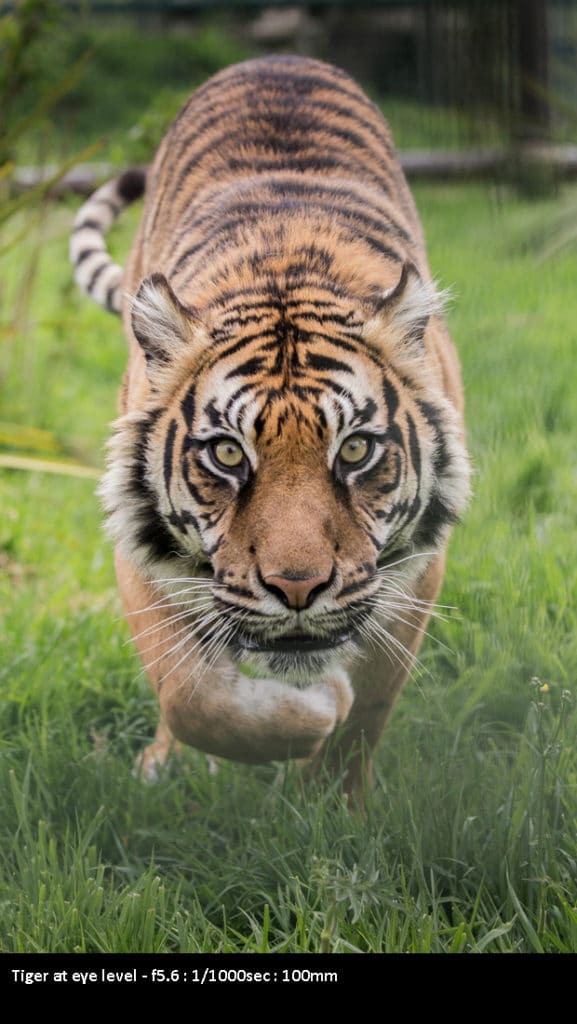
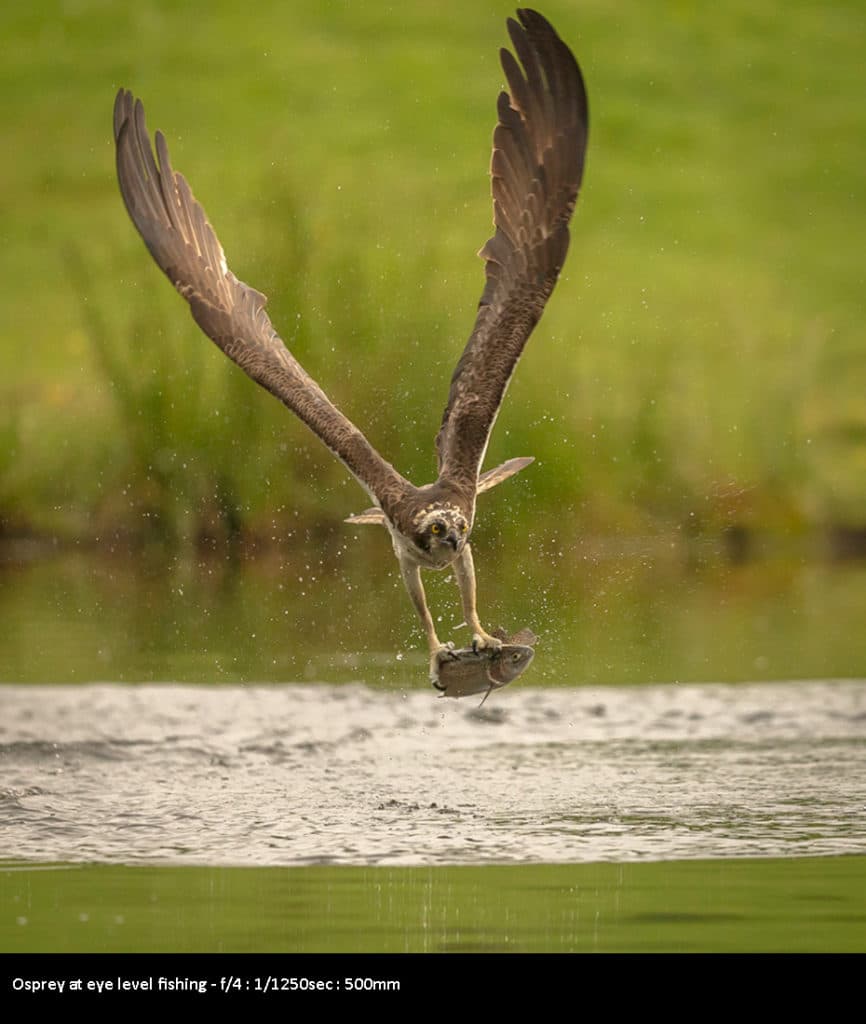
Angles and different points of view
There is something special about an image where the angle of view of the subject is at eye level or lower and how you portray the subject makes a world of difference. Obviously it is dependent upon the creature as to the impact that such an angle has on the viewer. A lower perspective can bring the viewer into the scene confronting them with a view from the animal’s perspective. We expect to see a “below eye level view” of an elephant, camel or giraffe but perhaps not so of a tiger charging or an osprey fishing.
EXAMPLE 8 – Tiger Charging
EXAMPLE 9 – Osprey Fishing
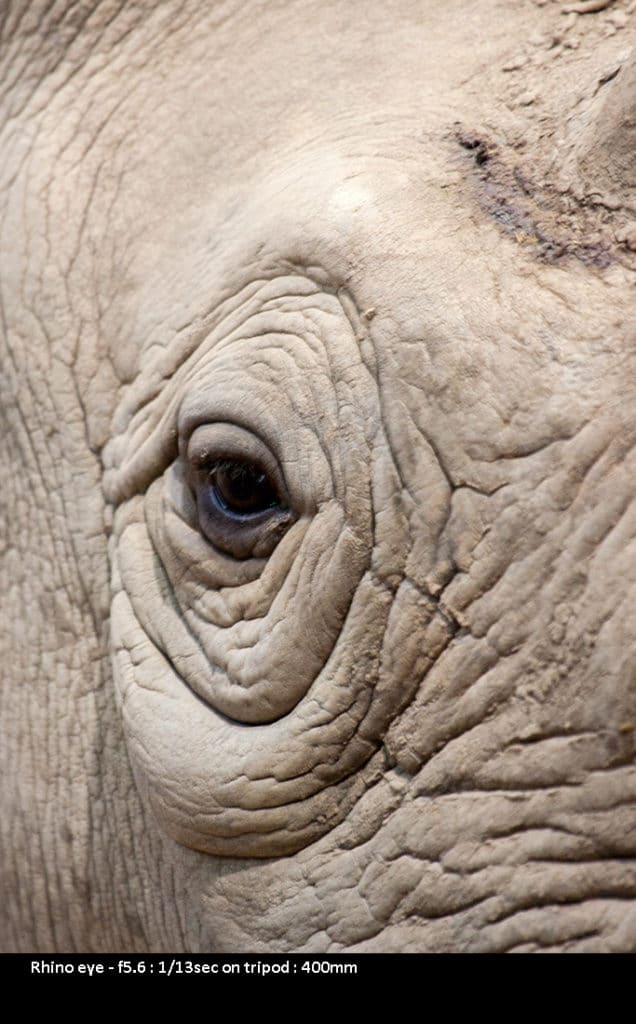
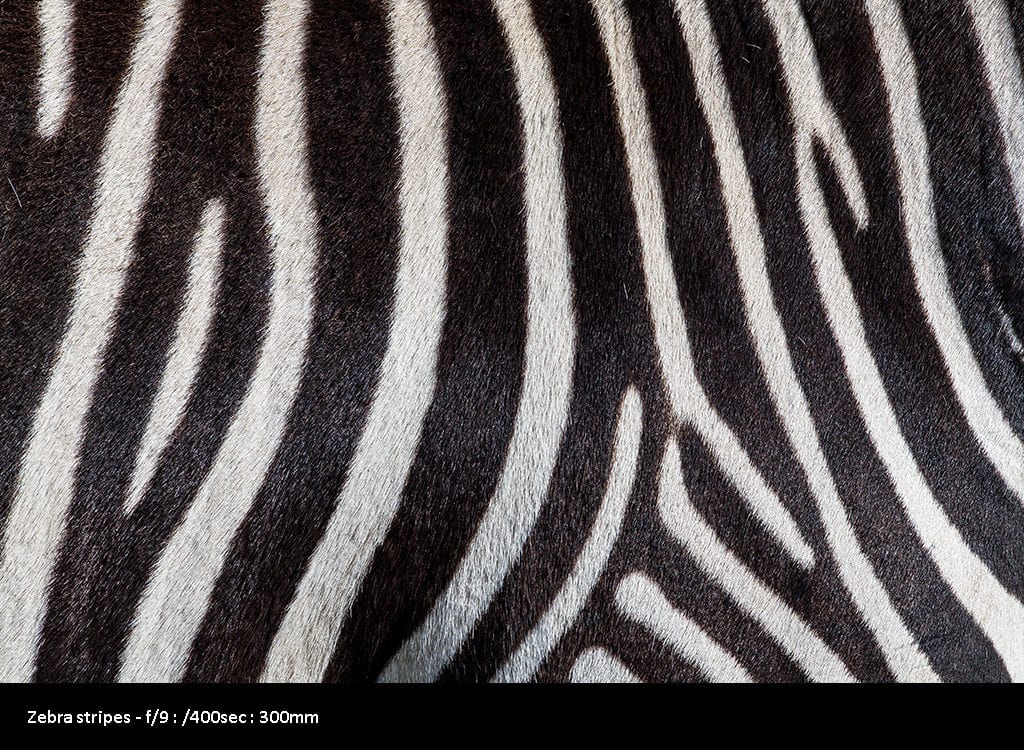
Shoot wide or close
There is a tendency and in many cases an obsession, for wildlife photographers to completely fill the frame with their subjects, in every photograph they take, isolating the animal from its environment by continually using the biggest focal length lens in their armoury.
In many cases the aim is to get as close to your subject as possible and it is necessary to use 500mm + lenses to simply get a decent shot. However, don’t be afraid to “shoot wide” in some cases to show a creature in the environment in which it lives.
Conversely why not shoot really close isolating just part of the animal to give more abstract compositions. Again, don’t be afraid to experiment and practice.
EXAMPLE 10 – Rhino Eye
EXAMPLE 11 – Zebra Stripes
What Types Of Wildlife Photographs Are There?
There are many and varied types of wildlife photographs to be considered, ranging from static environmental shots to frame filling portraits.
Some capture animal behaviour and some are all out action images. You will develop a personal style as you practice and as you become more successful you will start to shoot the wildlife opportunities that suit your style.
Environmental Portraits
By including the subject in its surroundings you can add something of a story to your image, by providing the viewer with additional information about the life and habitat of the creature.
EXAMPLE 12 – Mountain Hare In Environment

Full Body Portraits
A full body portrait cuts out much of the animal’s surroundings concentrating the viewer`s attention to the subject.
A tight composition enables you to notice greater detail of the creature and the intricacies of patterns and colours in fur and feathers particularly. Such detail can help to identify certain individuals within a group of the same species.
EXAMPLE 13 – Mountain Hare Full Body Portrait

This is just a short introduction to wildlife photography. To learn more, join an IOP online photography course today.
Enrol on the Professional Diploma In Photography now
Or Enrol By Interest-Free Instalments For £45 Per Month
If you aren’t sure whether an online photography course is for you, read our FAQs here.
Perhaps you are thinking about what qualification is best. Read this blog on whether you need a degree to be a photographer.
If you need advice on which camera to buy, you can get in touch with us or read this article on the best DSLRs for beginners.
If you want to take control of your earnings by starting a career in photography, check out this article on the best places to make money from photography.