In this months project, we’re going to be taking a very specific look into focus, or moreover ‘Selective Focus’. The focal point in an image is the point at which the eye falls, the point at which the photographer has decided to lock his or her attention and give poignancy or importance to.
This area can be as wide or as specific as the photographer chooses, but the wider the scope for focal attention, the harder it can be to grasp or retain attention from a viewer.
In this write-up, we’re going to be taking a good, long look at how selective focus can be gained and manipulated to give your images depth and persuade viewers to gaze.
What do we mean by Selective Focus?
When we use the term Selective Focus, we are referring to the area within a frame in which we very specifically want our focus to fall.
This doesn’t mean that we want our subject matter to be on the right, the left, above or below.
It’s also very specifically about how the settings on the camera affect the outcome of the photograph we take.
Naturally, these settings will always play a big part in how much of our image is actually in focus, as well as how quickly it falls in and out of focus and even how susceptible we are to those big pains such as motion blur, camera shake and exposure issues.
Why is Selective Focus important?
The way in which we read an image is, on the whole, very much a subjective experience. However, there are ways in which the photographer or artist can lead a viewer into thinking a certain way or prioritising what is in an image, using the idea of selective focus.
Since it’s similar to the way that the brain communicates with our eyes constantly and in day to day life, we are naturally drawn to the area of most focus within an image – that is to say, the crispest and most evenly exposed element.
When this is cast across a large area with lots of different stimuli, the eye can lose that sense of priority and the image can become cluttered or confused. Selective focus is an important way of leading our viewers’ eye in a preferred direction or to a preferred starting point.
How to engage Selective Focus
So, how do we go about engaging in selective focus? Below are a few pointers on how to get started.
Depth of Field
The simplest and probably the most readily used way of engaging in a more selective focus process is by producing a shallow depth of field. This, as we probably all know by now, is created by using very wide apertures.
The mix of the wide aperture, paired with your distance to your subject and also the distance of your subject to the background, will change just how immediately your focus begins to fall away from your subject matter.
A very wide aperture will cause a very shallow depth of field, and so here, your selective focus can be especially accurate. Be careful, however.
We talked about-about the way that we can temp a viewers gaze to the places in an image that we choose, but if that area is the only in any real focus, the image can fall into the trap of being blatantly obvious or a little too ambiguous. Unless one of these options is our sole aim, you should play around with some middle-ground here.

In the portrait here, a very wide aperture has been used to create a shallow depth of field, with the selective focus very much centred around the hair and bridge of the nose/eyes. The distance between photographer and subject is quite small, and so the background falls into quite a distinct blur, along with the likes of the arms and shoulders.
Proximity
There will be times where you want to narrow your aperture and get an image that has more of an all-encompassing focus. Even here, a selective focus can be used to draw the eye in, before it begins to casually meander through the image, picking up points of interest as it goes. This is where a landscape or outdoor scene that contains considerable depth or interest might come into play.
The composition of any landscape of wide-angle scene is one that will often require a little consideration for all the focal planes – foreground, middle-ground and finally background. The latter is the one that most will fall into the trap of focussing on, leaving no room for the former and subsequently, do depth or perspective.
Using that narrower aperture doesn’t mean that selective focusing cannot be used aptly. You need to consider your proximity to the objects around you that little bit more. It may be that your foreground interest becomes to the main focal point.
It may even be that you choose to shoot directly past this immediate foreground interest but leave it slightly in the frame, causing some immediate blur before the middle-ground interest falls into place. Either way, this proximity is a wonderful way of shedding light on your stance and context as the photographer, rather than throwing your focus to a distant view, or sunset, miles and miles away.
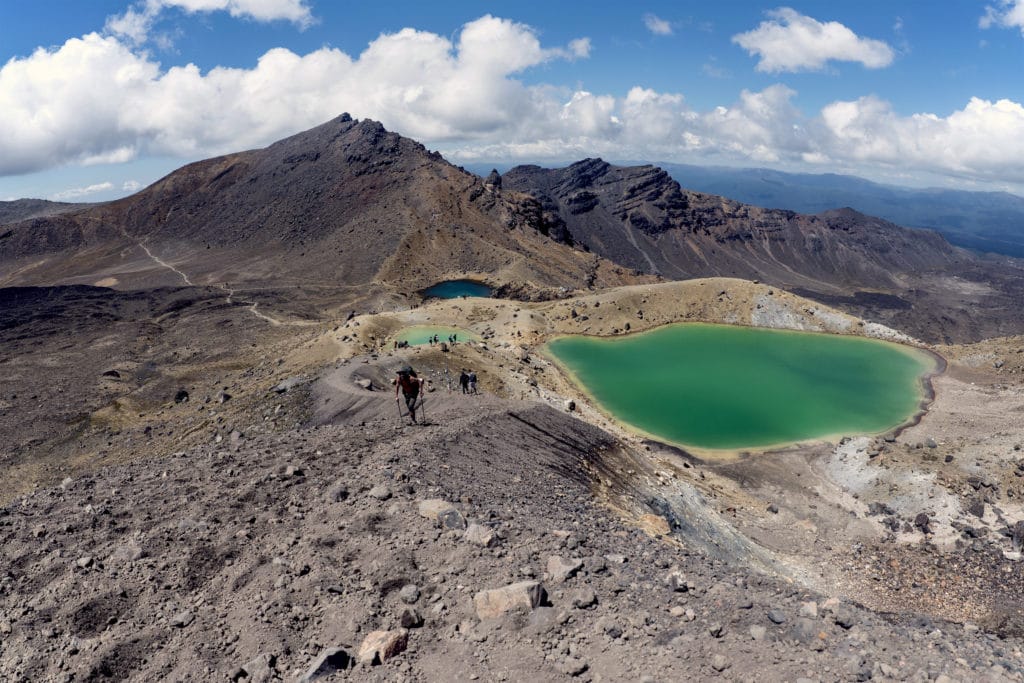
In the image here, attention to proximity was used with a much narrower aperture. The depth of field is far deeper than the last example, but selective focusing was used solely on the figure and immediate foreground to add texture and simply place a little more context on the stance and angle of the photographer.
Framing
When we talk about framing in photography, we usually mean the way in which we compose a shot, via the confines of the box we see through before shooting. But what happens if we start to shed away at that frame using elements of the subject matter we’re in fact shooting?
Selective focusing here can be used not only to draw the eye into a very specific aspect of a frame but control and play around with exposure. You could quite happily change your metering mode in a scene of varying degrees of exposure to pull the eye towards a focused subject.
Here we can see how a quick change in the metering mode – to spot metering – and a focus thrown towards the brightest area in the frame causes a smooth tonal gradient from the brighter areas to almost black around the frame. The scene, in this case, seems to very atmospherically come to life s the light increases.
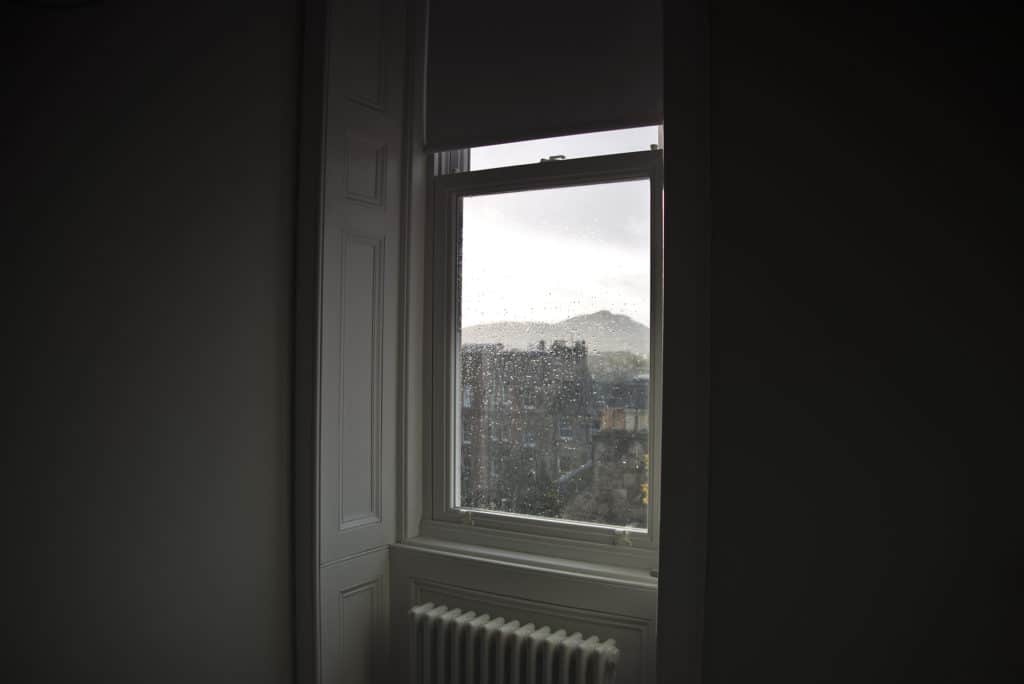
A wider aperture was used here, and the focus thrown to the droplets of rainwater on the window pane itself. It’s here that the eye is drawn to, more than it is the outside world – though we can happily engage with it.
Practice different selective focusing techniques and see what results you can achieve.
Find out more about our courses here
Download a Free Prospectus
Get your Free Guide To Composition here