Turning To The Light – How Lighting In Photography Transforms Your Images
We’ve looked into just how long exposures work and shooting in darker conditions.
We’ve explored the differences between subtle tonal gradients in black and white photography and the harsh cutting lines of street photography, but it’s now time to take a good look at the one thing that makes photography at all possible and in it’s purest and brightest form, natural light!
Many of us will stray away from shooting in very bright conditions. Overexposure is something that really cannot be rectified once it occurs in our images, unlike its counterpart – underexposure and yet I see it time and time again. So how can we use light to our full advantage, even when we think it’s simply too strong to shoot in?
This month I’m going to be letting you in on a few integral hints and tips that can really aid you in your quest to create punchy and creative images when shooting into the sun, with the sun and by the light of a classically British overcast day.
Shutter Speeds and Apertures
The first thing we need to comment on, as we do with every photographic genre, is the relationship between the shutter and the aperture. Many of you will have tried to shoot in incredibly bright conditions, only to find that the shutter maxes out.
We look to our viewfinder to see the flashing ‘1/4000’ symbol or even the flashing ‘1/8000’ symbol! In a nutshell, this means that the light entering the lens is far too powerful for the shutter to fire within its limits and keep an even exposure level.
You’re in real danger of overexposure. This is naturally where you would narrow your aperture, or even lower the ISO if it was anything more than 100.
A tweak here and a twist there and suddenly, you’re in a realm where your shutter can fire fast enough and you’re exposure levels look acceptable. But this isn’t to say that there aren’t still problems and hurdles to overcome when we begin shooting in that bright sunlight.
A number of issues arise depending on which direction we are shooting. So let’s take a look at the problems, causes and solutions of each.
Shooting into the Light
Backlighting
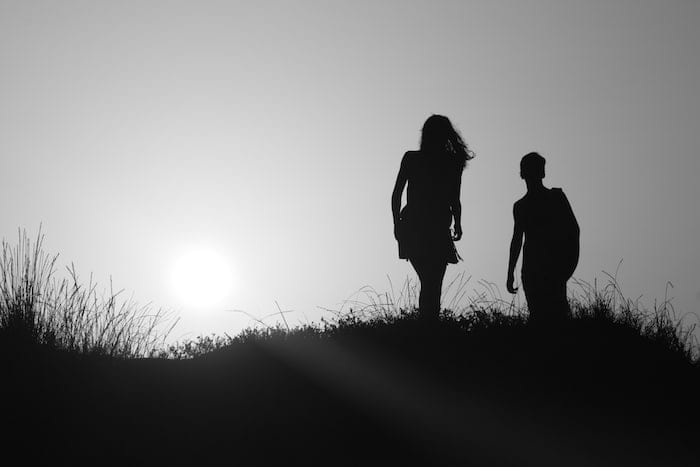
If you happen to be shooting into the light – be it a landscape, portrait, street photography – you’re going to encounter some form of backlighting.
This can act as your best friend or your worst enemy.
A backlit scene means either plunging your subject matter into complete silhouetted darkness or if you choose to throw your focus to your subject as many of us naturally would, a huge drop in shutter speed and an over-compensation in exposure in all of your brighter areas.
The long and short of it is that you need a middle-ground, and quickly.
Exposure Compensation
The exposure compensation function is one that you should always be ready to engage. In my opinion, it’s one of the most important functions on any camera.
When your subject is backlit by the strong light you’re almost certainly going to get some silhouetting, or at the very least an amount of underexposure that you don’t really want to be dealing with in the editing process.
Engaging the exposure compensation by a couple of ‘+’ stops can have an incredible effect on your images. It works in the same way that turning to Manual and reducing your shutter speed would generally work, only much quicker.
If you find yourself in this situation, a quick twist of a dial drops your shutter slightly and engages an increase in exposure value, meaning the light hitting the back of your subject suddenly finds it’s way around your subject and provides more of a tonal gradient, rather than a jet black nightmare.
It’s in these situations that we can start to play with highlight effects around a subject and what we call ‘lens flare and light bleed.’
Light Bleed
Many would run from light bleed but it can actually be a wonderfully useful way of adding a little atmosphere and mood to your images. A simple portrait image can become one filled with the haze and warmth of a spring day on account of a little bleed.
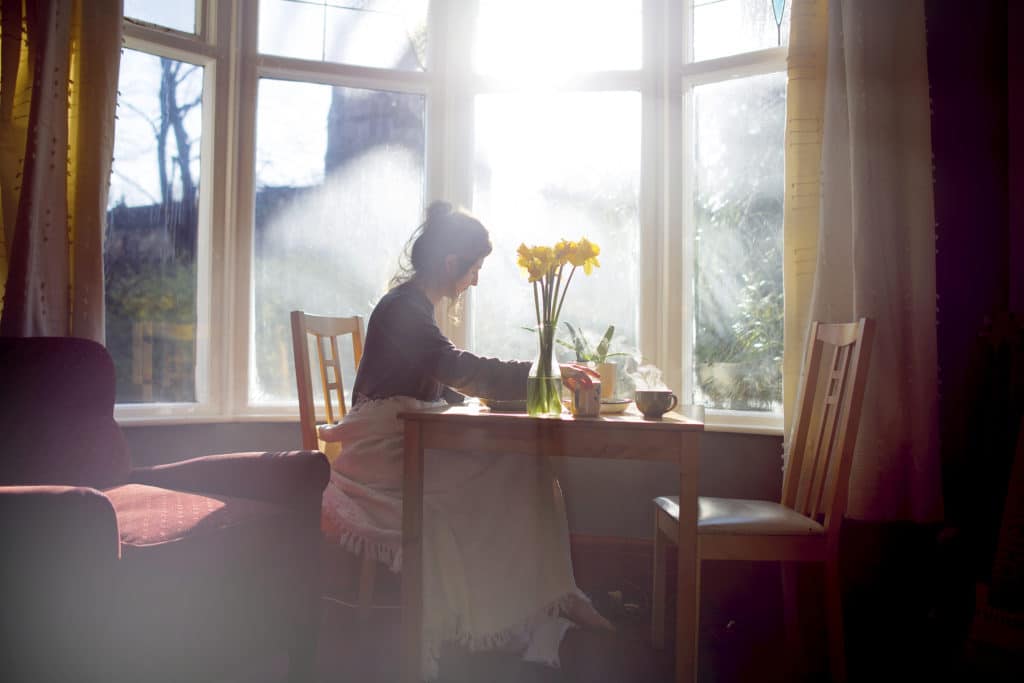
In this image, an intensity in outside light cast many of the subjects in the living room into darkness. A quick change in the exposure compensation meant the light suddenly bathed the subject in subtle tones and the results, along with a little editing, are far better.
Lens Flare
There are divided opinions on lens flare but it can really work as a different kind of aid for mood and atmosphere in an image. I find this really wonderful to work within wedding photography and when shooting outside and into the sun will often seek out the sun and change my angle to get lens flare as well as light bleed.

In this example, a literal drop to the floor with a 50mm 1.4 lens meant using that intense sunlight to create flare across the frame.
Shooting with the Light
As you might imagine, shooting with the light is a lot easier than shooting against it. However, this can mean not having quite the intensity, atmosphere or mood that we see in our above examples.
When we shoot with the light, be it sunlight, steady overcast light or otherwise, we might have to look a little harder at what we’re shooting and why we’re shooting it.
HINT: It’s also important to note that a portrait shot with the light is just as problematic as one shot into the light. Here we run the risk of squinting from our subjects and unsightly shadows cast over facial features. In this instance, it’s often a better idea to simply change your position slightly, so that you and your subject can shoot in relative comfort.
Let’s take a look at some of the ways shooting with the light can aid you in your search for great imagery.
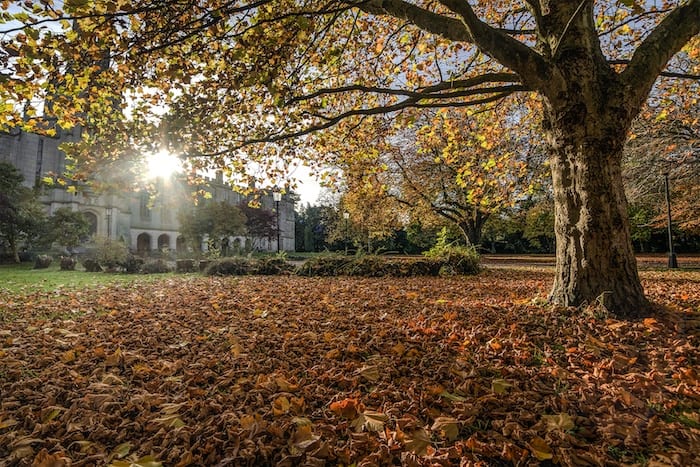
Colour
Colour is something that can often go unnoticed unless we’re really looking for it. The way that light plays off of surfaces can be a fascinating thing and different colours will absorb light in different ways. This is where your attentiveness to your scene can make all the difference.
Keep your eyes peeled for reds or greens that really ping in bright sunlight. The blue of the sky can be a fantastic aid in this also as your complimentary colours communicate within your frame.
Subtle earthy colours such as woods and autumnal leaves can make for really warm and enveloping images when your sky is a little more boring and overcast but they also act wonderfully as a filter when wanting to block out the direct sunlight.
Reflection
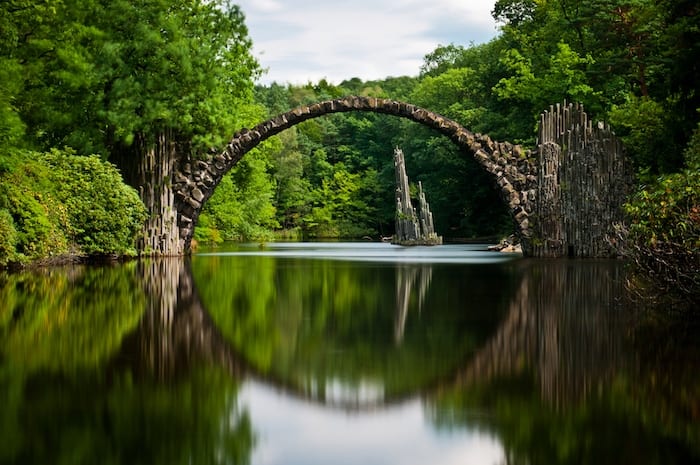
I will often bring up reflections because they are an incredible way of playing with focal planes and creating ambiguous results, particularly when out on the street or in urban settings. In cities and towns, you’ll find that architecture is fantastic for documenting this bouncing of light back and forth.
Not dissimilar to colour, reflections from various surfaces and shapes can have a great effect on your overall image and this is true in any sort of daylight conditions. In fact, even a dreary rainy city scene has its interest, where light reflects from puddles and pavement surfaces.
So there you have it. With any luck you’ll be out shooting, using your exposure compensation setting and really getting bold with your daylight shooting!
Find out more about our courses here
Download a Free Prospectus
Get your Free Guide To Composition here