Part 3: Dynamic Range in Action
We’re going to look at some DRO results from a real assignment to produce interior shots of a pub/restaurant.
“In-Situ” interior photography is extremely challenging. It regularly presents the same challenges as the example of our room we previously considered in Part 2 of this blog.
The problem can be overcome using carefully positioned flash units that fill the shadows in such a way that compliments against the higher sources of daylight entering the room. It’s an established technique used by top-flight professional interior photographers. However, it’s time-consuming and therefore expensive. Very expensive. Unless the return on the project can be comfortably covered by the cost of the photography, for most businesses, this is not an option.
So, how did we achieve the same result that meets the customer’s requirements without rocketing the cost out of budget? DRO. Also note that because these images were for a real customer, some post-processing on a computer was also undertaken, but the principle results are the same.
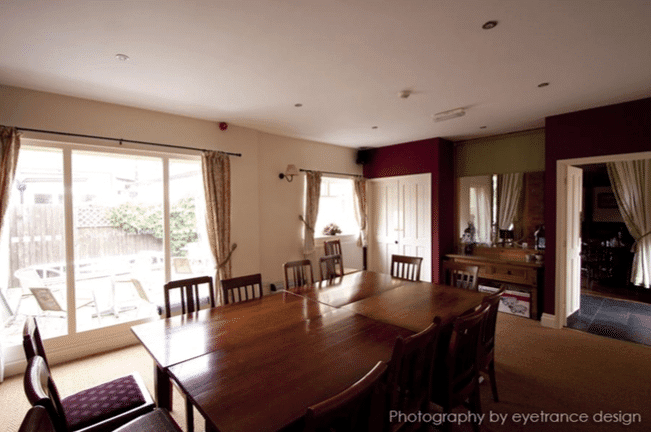
The above image is of the meeting room at standard exposure. As you can see, the camera is dealing with a wide dynamic range of light from outside illumination on the left, its reflection on the table surface through to the shadows created to the right of the view and at the far end of the room.
What we have here is the best average exposure achievable over the range of light sources presented to us. What we’re left with is the left side of the image over-exposed or blown out and elements to the right and bottom of the images underexposed or blacked out. This image could be much better.
If we wanted to use this image to present to a potential customer who may want to hire this room, what we’ re showing them is what the camera saw, not what the human eye would see. The most prominent aspects of this room are the windows and the views through them. The size of the windows directly affects the sense of light and space within the room. What we need is to show the customer what they would see as if they were actually in the room at that time.
This is the same image using DRO.
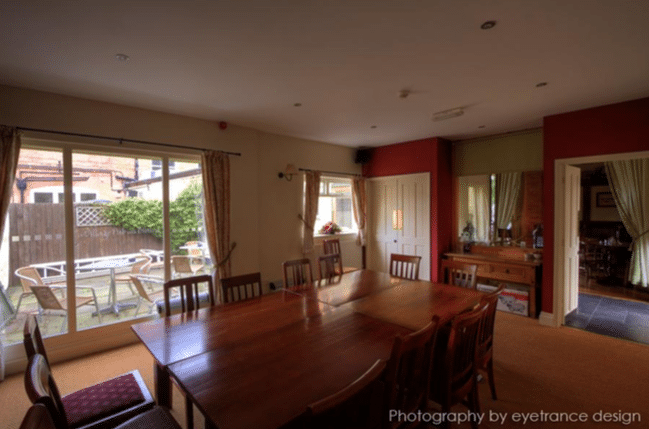
We can now see the view out of the windows. That white reflection off the table is dramatically reduced and what is beyond the entrance to the room on the right is clearer. Overall, the exposure is much more balanced across the extremes of light and shadow presented in the original image and gives a sense of space.
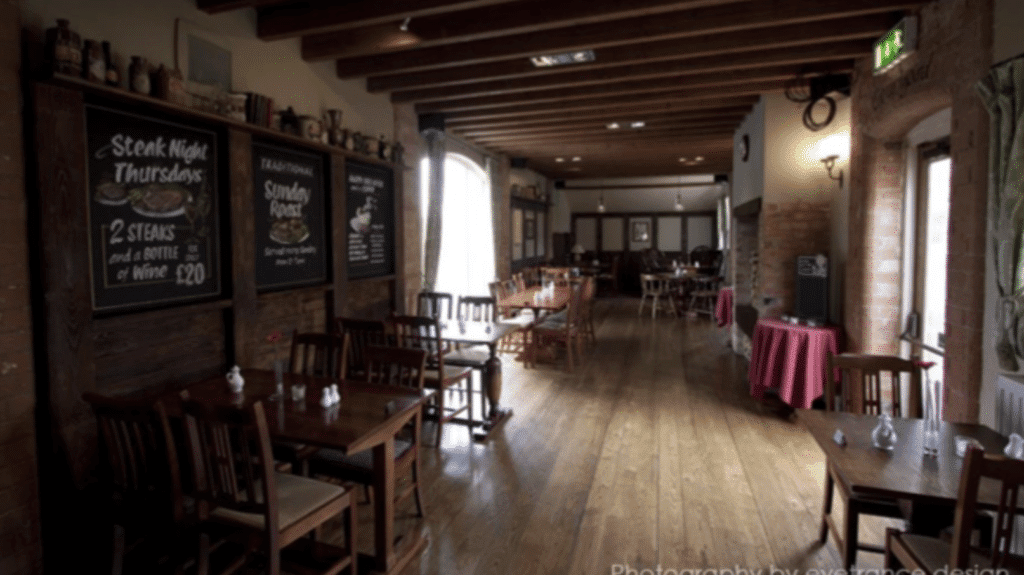
This image is a shot of the restaurant. It’s perhaps the most challenging area of the whole assignment. Whilst spacious to walk through, the room is elongated with two sources of daylight on the left and right. The amount of light entering the room is such that the camera is confronted with a “light-hotspot” in the middle of the picture and cannot achieve a balanced exposure to ensure the front, sides and far end of the room are adequately lit.
If it did, the daylight sources on the left and right would be so blown out, including the reflections off the tables, the eye would be distracted from looking along the length of the room. Also, the difficulty in achieving a balanced exposure has rendered the wall lights blown out.
The purpose of this shot is to promote the atmosphere of the restaurant. Unlike the meeting room, we considered previously, the windows here are not the most prominent aspect. What this shot needs to achieve is a sense of ambience and relaxation surrounded by comfortable décor. Again we need to show the customer what they would see as if they were actually in the room at that time.
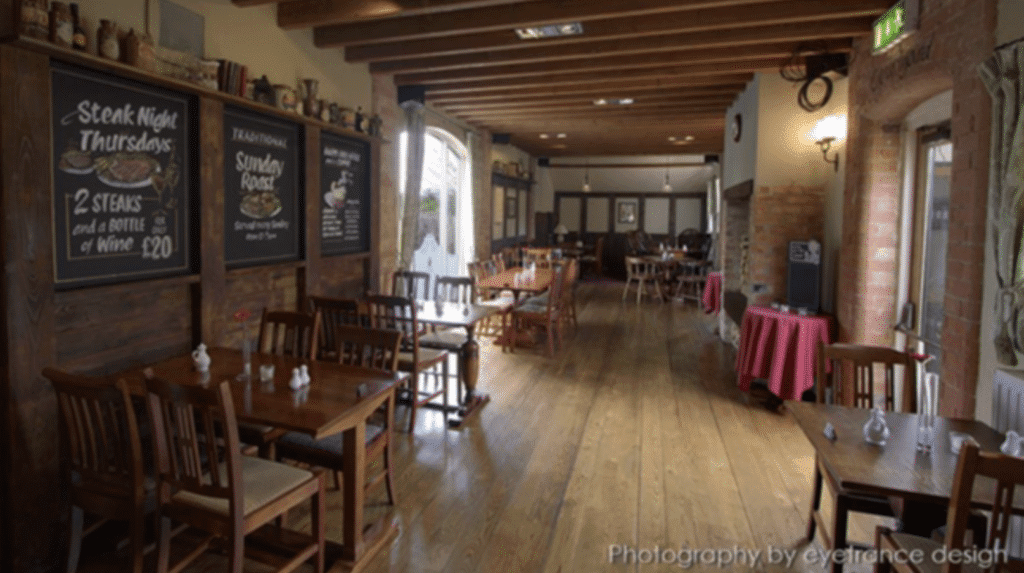
Using DRO, the overall exposure balance throughout the room is much better. We can see out of the windows, and the internal lighting from front to back gives the customer the sense of actually being in the restaurant area. This resulting image has been slightly cropped and aligned
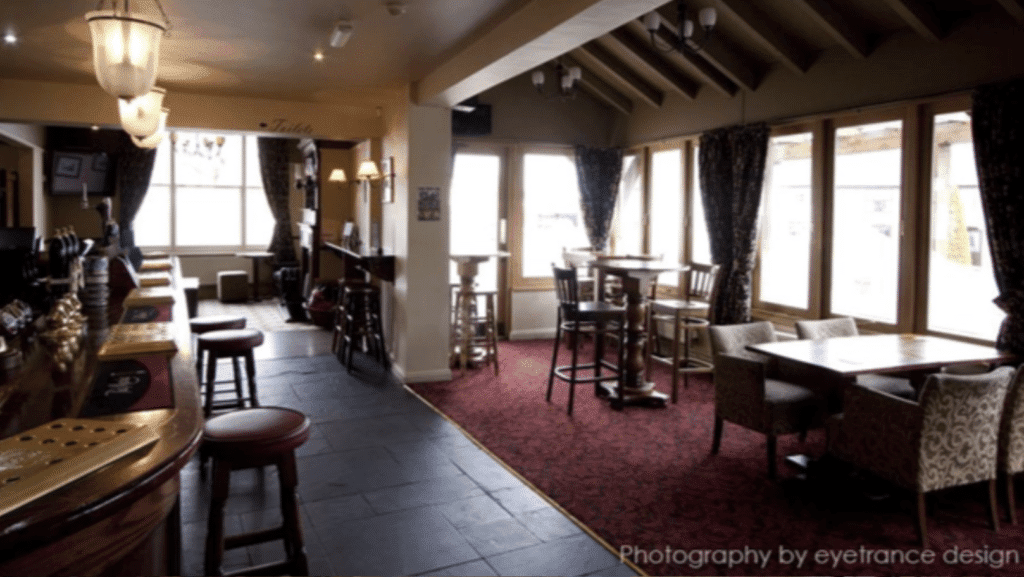
This is the main bar area also showing one of the snugs located behind the main window to the front of the building.
Like the shot of the meeting room, the prominent aspect of this area is the windows allowing a comprehensive view outside. However, the windows both in the bar area and the snug present the significant challenge. The camera is presented with two major sources of light, both of which render it impossible to achieve a balanced exposure of the interior. This is an excellent example of averaging exposure across a scene with two or more extreme sources of light and how it doesn’t work.
If we were to adjust the exposure to lighten the interior of the bar area, the windows would then be so blown out as to completely distract the eye from what should be an interior view and the surrounding area through the windows.
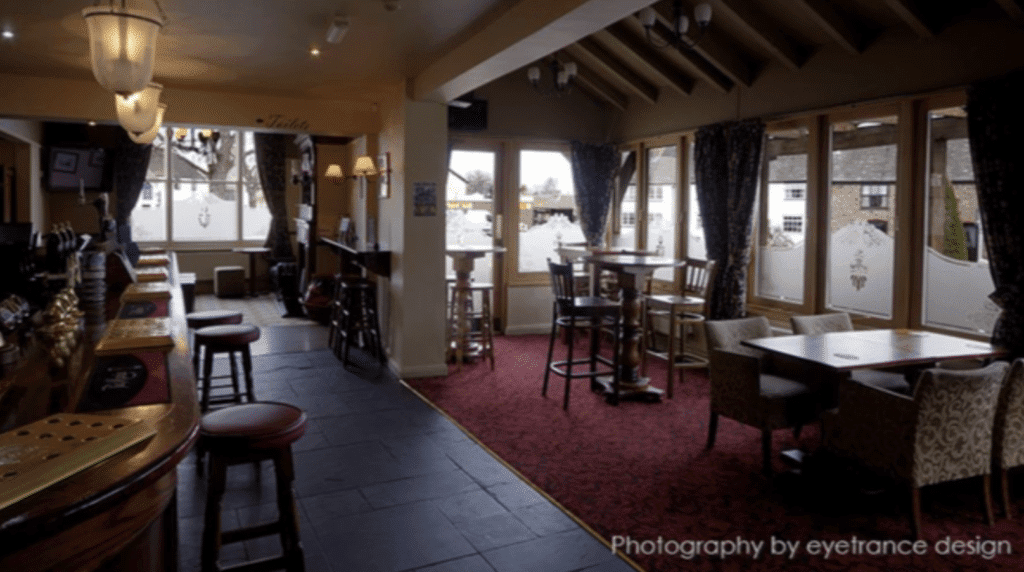
Using DRO, the image now portrays a warm, welcoming ambience with balanced exposure across the area and clear views out of the windows.
In this final example, this shot of the sidebar area and snug present similar challenges to the last example. Lots of daylight entering the window causes the camera to over-compensate for achieving an average exposure across the scene.
As a consequence, the windows are blown out, and a clear view outside is lost. For this shot to work, the snug needs to be seen as a warm cosy area and convey views outside.
Applying DRO achieves a balanced exposure across the whole scene.
HDR or DRO is a personal choice. Some photographers rave about DRO while others are firmly in the HDR camp. Try both and decide for yourself which technique produces the results you require.
Take a Course With IOP®
If you decide it’s too challenging to learn photography on your own, get some help from the experts. IOP® provide the most popular online photography courses available. We have over 20,000 students, all over the world, following our program and creating photographs they never thought possible.