This month we’re going to be taking an in-depth look at understanding metering. Many of us will understand how the light meter in our cameras works, but will seldom think about actually altering our metering mode when shooting.
It may be that you’ve never really tried, or considered metering to be necessary, but in fact, it can have a real impact on the quality of the images you end up producing. So let’s get started!
What is Metering?
Metering is an in-camera process which gauges and reads the light source in your image when you focus on your subject, enabling an appropriate shutter speed or aperture reading – depending on your shooting mode – and giving you an indication of the best possible exposure in those circumstances.
If you’re not familiar with metering as a term, you will most likely be familiar with the meter reading that pops up in your viewfinder when engaging your focus on a subject.
This is usually presented as a scale which has a ‘-‘ at one end, a ‘+’ at the other, and ‘0’ in the middle. As you move your camera from one subject to another, this scale will indicate how under, over or evenly exposed you are.
Advantages to Metering
Probably the most significant advantage to metering on all cameras is that it will always be present. Even in full Manual mode, the meter will still indicate whether your scene is under or overexposed based on your settings.
Many find this a big help when coming to terms with the relationship between aperture and shutter speeds in Manual. The meter provides a quick and easy indication on whether you should be altering accordingly.
In modes such as Aperture or Shutter Priority, the meter will work actively in conjunction with whichever setting you do not have priority over to match an appropriate shutter speed or aperture respectively to your chosen Aperture/Shutter.
The Problems with Metering
Though metering in most digital cameras is very advanced and a fantastic way of understanding exposure, it will often struggle when confronted with areas of difficult light, changing light or harsh, contrasting exposures.
Have you ever shot an image that was backlit, only to get your subject wholly silhouetted? Perhaps you’ve shot into a very dark space, with just a small amount of intense light to focus on – a bridge or a tunnel, for example – only to have most of your image blown out or overexposed? This is where metering in the broadest sense can let us down.
It can only really aid us in our quest for even – or moreover correct – exposures when the exposure of the scene is relatively even, to begin with, and as we know, light doesn’t always work in our favour that way. It’s here that we need to know when to engage a change in the metering modes.
Metering Modes
As with any in camera process, we can override or manipulate how these methods work and metering is no different. There are three main changes you can make to your metering, to make changes to your exposures.
Matrix/Evaluative Metering
Matrix or evaluative metering is the metering mode that many of you will be most familiar with and is the default metering mode on most cameras.
In Matrix/Evaluative metering mode, the entirety of your frame will be read by the light meter, and the resulting readings are given, based on this.
Your focus point or points will always take priority, as the camera assumes this is where you want the exposure to be as even as it can, but the evaluative nature of this mode means that the rest of the frame will have an impacting result on how that focal point is exposed.
When to use Matrix/Evaluative Metering
If it sounds pretty self-explanatory, it’s probably because it is. Evaluative or Matrix metering is the perfect metering mode to use when you have either a broad scope of subject matter within your frame or/and when you know your frame isn’t going to cause too many problems exposure-wise.
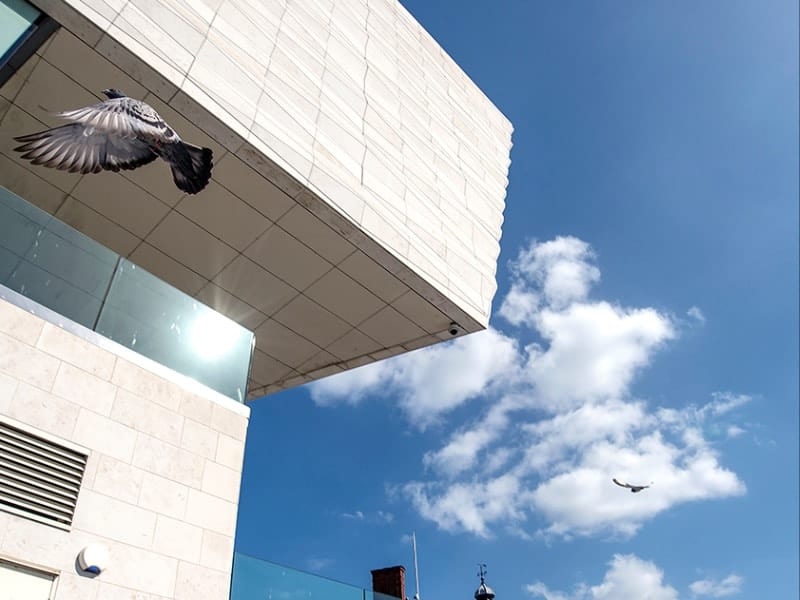
In the image above, we can see how the bright conditions and angling of the camera make for a very even, punchy and bright exposure value.
In this instance, the use of evaluative metering is wholly justified. The entirety of the frame has been read and an exposure value created to steer clear of any over or underexposure problems.
In this instance, the photographer had to act and shoot quickly.
A more limited metering mode would have restricted the exposure value to darker or less strong areas of light in the photograph, which in this instance, would almost certainly have darkened the exposure of the pigeon.
Centre-Weighted Metering
Perhaps even more self-explanatory, is centre-weighted metering.
In this instance, the meter will work on exposing the centre of your frame correctly, across what could be considered a relatively large area.
This kind of metering is particularly useful for the likes of portraiture, but also centrally placed subjects that struggle under the interrogation of specific light sources.
Unlike Matrix/Evaluative metering, centre-weighted metering will ignore all other areas of the frame, but the centre and surrounding, making it very useful when a subject is backlit, for example.
When to use Centre-weighted Metering
You should be quite selective and careful when using centre weighted metering.
Your subject should be one that fills a large proportion of the centre of the frame, as the difference in exposure between subject and light source can battle each other, and the reading can end up a little off. This is by no means set in stone, as the example below shows.
It’s more of a case of trial and error here and the more you shoot in centre-weighted, the more accustomed you will become to the results and in what circumstances it is best used.
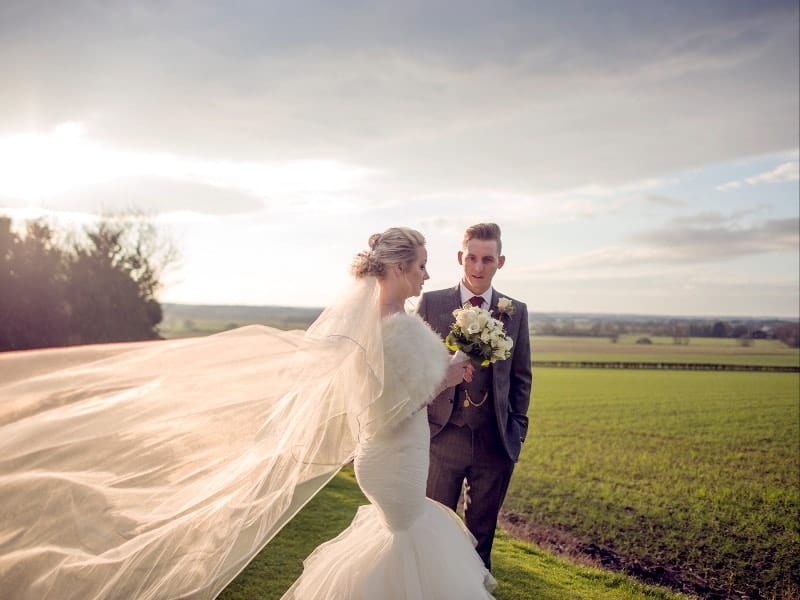
In our wedding photograph, the couple is captured at a moment where the sun just creeps through the clouds behind and backlights them quite intensely.
As an initial way around this, the photographer could up the exposure compensation to make up for the silhouetting caused by the direct sunlight behind the couple.
However, pairing this with centre-weighted metering meant that the couple could be exposed evenly, while the background is subject to some quite heavy overexposure.
Important Tip: Centre-Weighted Metering will not work under the ‘focus/recompose’ method.
When we lock our focus on a subject and recompose, it’s a simple and effective way of getting alternate compositions, but this technique will not lock in the exposure value.
The meter will continue to read the scene once the focus is locked and this may throw out your initial reading. If you’re going to use centre-weighted metering, try to remember this, and crop or re-compose your image accordingly in the editing process.
Spot Metering
Spot Metering is probably the most exposure specific metering mode. When we engage spot metering, the camera reads the exposure around your focus area and nothing else.
This is a convenient mode to employ when using Single Area Autofocus modes, as you can be in full control of what point of the frame is being read for its exposure.
When to use Spot Metering
Perhaps you’re out shooting street photography or, as in the example above, shooting candidly at a wedding.
You’ll want to shoot and move, quickly and focus on individuals. With spot metering, you can be safe in the knowledge that the exact point of focus will always be the one that’s exposed correctly.
The focus/recompose technique will cause you the same issues in spot metering mode. However, with the flexibility to change which focus point is engaged, you have a little more flexibility in where in the frame your subject sits.
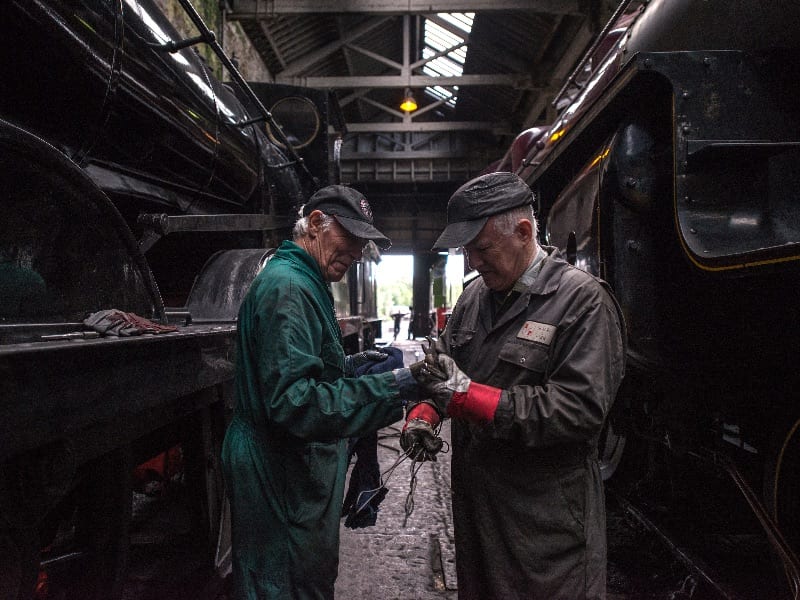
The subjects in this image are very central, but spot metering was used on a very specific area of focus – the light falling on the face of the gentleman on the left – to create a wonderfully atmospheric image and taking control of the very bright and very dark areas in the steam engine shed.
If we were to use Centre-weighted Metering on this scene, we would probably see considerable underexposure as the centre of the frame contains an intense exposure from the open doors in the background.
Evaluative metering would likely see a lot of overexposure as the majority of the scene is very dark indeed.
It is imperative that you get used to using these modes if you haven’t already.
For some reason, metering tends to be one of those aspects of photography that is mostly ignored by hobbyists or keen amateurs primarily, but once they open up to the idea of using it, they wonder how they ever shot without it!
Get out into the glorious winter sun and play around with what metering can do for you, and I look forward to seeing all your submissions in November.