Discover our top ten photography tips for beginners.
READ THE MANUAL

We know, it’s boring, it’s long, and it’s complicated, but even if you only pick up a few snippets of information, it’s worth reading the camera manual.
You would be surprised how many people take one look at the little book that comes with their camera and then put it back in the box without ever glancing at it again.
With that in mind, it’s not War & Peace; you don’t need to read it cover to cover.
Break it into manageable chunks. Think about what you already know (this might be how to insert the battery or set the Aperture Priority Mode) and then have a good look at what you need to know.
Get your highlighter pen out and pick out the areas that you need the most help with understanding. In our experience, these are Metering, Autofocus and Custom Settings.
Take your time – read the manual over a few days and only small sections at a time.
STOP CHIMPING
Chimping is the practice of taking a photo and then immediately looking at the screen to see how it’s turned out.
What’s so bad about Chimping?
Well at the very least, you might miss a great opportunity while you are admiring your handiwork. It also puts the pressure on to get a perfect shot every time, and you can’t see the photo properly on the screen anyway.
Many a great photo has been deleted by an eager ‘Chimper’ because it has been deemed not good enough.
Go with the flow, enjoy your photography and check out your shots at home, when you have time and can view them on your computer.
SHUTTER SPEED

ALWAYS be aware of your shutter speed.
If only one tip sticks in your mind, let it be this one. If your shutter speed is too slow, your subject will be blurry and out of focus.
We have lost count of the times that we have had a portrait submission for an assignment which has been shot at 1/40 or 1/60 shutter speed and is out of focus as a result.
If you are holding your camera by hand (i.e., not using a tripod) try to aim for a shutter speed of at least 1/125 for general shots.
Freezing fast-moving objects (like the skier above) will require a much higher shutter speed.
Of course, there will be times when you want to create blur and movement, and there are other considerations like focal length, but if you want it sharp, stay above 1/125.
We talk about this in much more depth on our photography courses.
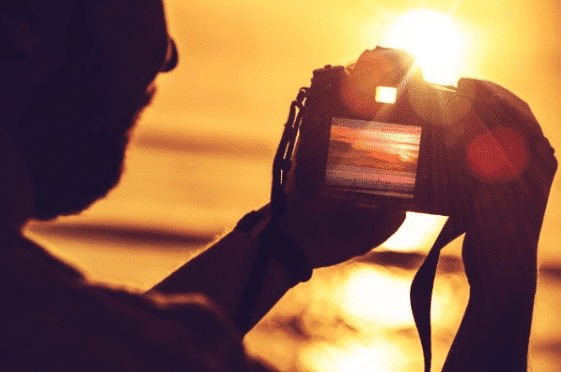
A GOLDEN OPPORTUNITY

Have you heard of the Golden Hour? It’s that hour just after Sunrise or just before Sunset, and it gives you a great chance of capturing interesting lighting.
You can photograph the most stunning landscape, but if you do so at midday, in flat, uninteresting light, you are missing an opportunity to transform your photograph into something special.
During Golden Hour, the sun is low in the sky, casting a soft, diffused light in warm and sometimes vibrant tones.
Another benefit of Golden Hour at Sunrise is that although it takes a bit of effort for those who are not natural early-risers, you can be pretty sure that there will be fewer people around walking into your carefully composed scene.
If you have a landscape in mind that you want to photograph, or you have already taken that shot, but it hasn’t come out the way you want, visit the location at Golden Hour and see what a difference a bit of dramatic lighting can make.
YOU’VE BEEN FRAMED
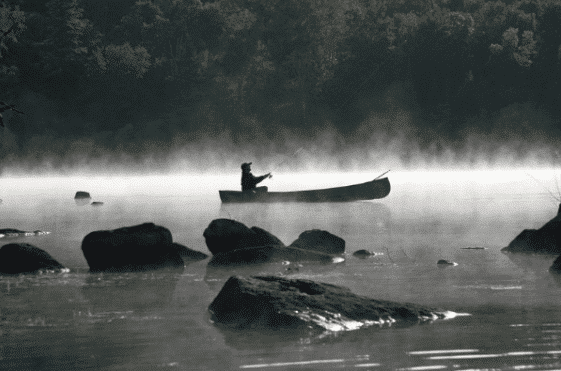
Think about the whole of your frame when you take a photograph, not just the subject in front of you.
We’ve all seen unfortunately positioned people with lampposts protruding from their heads, or light fixtures growing from their hair.
You should keep an eye out for any obvious problems in the background before you take that shot, but that’s not the whole story. Consider the edges of your frame as well.
You don’t want items half in and half out of the frame, like rocks or fences, as this makes the composition feel incomplete.
Take a look at the photo above. The photographer has done a great job in capturing atmosphere and drama, but the framing could be improved. The rocks at both edges of the frame are cut off, and this makes the composition feel incomplete and rushed.
A good tip is to compose the shot and then cast your eye around the four sides of the frame for distractions or unwanted objects.
PRACTICE
Famous photographer Henri Cartier-Bresson said, “your first 10,000 photographs are your worst”.
We can’t stress the importance of practice enough. Many beginner photographers are far too hard on themselves, expecting perfection too soon. You need to experiment, taking lots of photos which you might deem not good enough. It’s that experience that will allow you to create the images you envision in the future.
Often, you have to take a lot of photos to get the shot that you have been dreaming of producing. Never be without a camera, even if it’s a small compact you carry in the glove compartment of the car or your top pocket.
LIGHT IT UP

Think about lighting in every photo you take. Photography is painting with light after all, and too many photographers forget how vital the lighting within an image is.
Where is the light coming from? How can you use the light to create an effect in your image? What are the darkest parts of my frame? What are the brightest areas? All of these questions should spring to mind when shooting any subject or landscape.
Understand that there are different kinds of light which all produce unique effects on your photos. Next time you take a photo, don’t look at the subjects in the frame, look at how the subjects are lit. We guarantee that this will change your photography for the better.
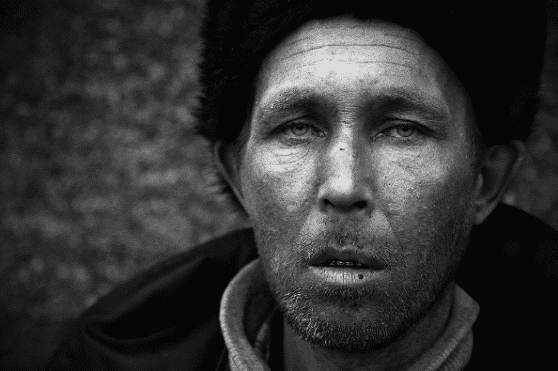
FILL THE FRAME

“If your pictures aren’t good enough, you’re not close enough” – Robert Capa.
The most significant mistake that photography beginners make regarding composition is leaving too much space in the frame. If you are unsure of how much of your subject to capture, fill that frame for a more dramatic composition.
You can either zoom in or get closer, it’s up to you, but make it clear to your viewer that this is your subject and be bold with your composition. Filling the frame also cuts out the clutter that can be a compositional distraction.
THE MIDDLE GROUND
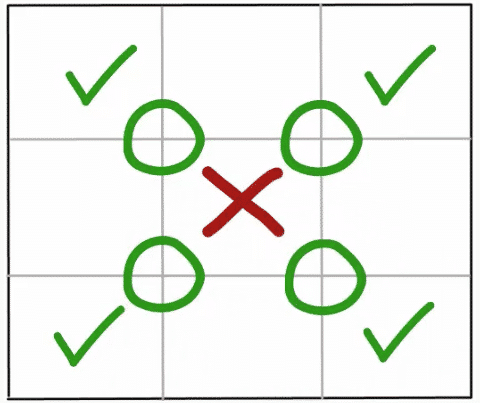
You have probably heard about the rule of thirds.
Very simply, this means that you should try to avoid placing your subject right in the middle of the frame. Compositionally, photographs work better if your subject is at a point where the lines of the ‘Rule Of Thirds’ grid bisect, like in the photo above.
The rule of thirds is fascinating, and there is so much to learn on this subject. Just knowing a few simple tips around the rule of thirds can immediately improve your photography.
Once you have learnt the basic rules of photography, then you can start to break them, but that’s a whole other area!
TAKE AN IOP® PHOTOGRAPHY COURSE
Finally, if you want to improve your photography, consider taking an IOP® online photography course.
With more Tutor support and advice than any other online course available, we can help turn your photos from drab to dazzling.
Find out more about our courses here.