It’s probably two years since I last wrote about advanced portraiture for the benefit of students taking part in the related monthly project. I wanted to revisit and take a more in-depth look at this crucial topic.
People are wonderful. People are strange, beautiful, characterful, talented, terrifying and unpredictable. It stands to reason then that ‘people’ tend to be the driving force behind why a lot of us pick up a camera in the first place. Whether it’s a family member, a lover or the man on the street, our urge to interact, communicate and comment on (and with) other people is a robust and intrinsic one and so crops up across the board when it comes to art in all of its forms.
So why do I want to talk about Advanced Portraiture? That term is perhaps a little unnerving for those of you who don’t see yourself as ‘advanced’, but this write-up is less about technical abilities, settings and faffing with backdrops and studio shoots. It’s about how to change your mentality on shooting portraiture. It’s about knowing your subject and your intentions and then engaging some relatively straightforward tips that will take your images of people from good to potentially great. So let’s get started by looking at these in more detail.
Know Your Intentions
I say this in most write-ups. It’s probably one of the most essential factors in any realm of photography. Sure, happy accidents are fantastic, experimental photography should always be practised and spontaneity is a wondrous thing, but these can only really be born from an ability to know what it is you’re doing and having a grasp on how you think you might go about doing it.
An intention to act within a particular light source, for example, might morph as you begin to shoot and your intentions and the reality start to meld together, but one is always bred from the other.
Shooting from the hip, out on the street will produce within you an intention and a knowledge of your kit that must be practised and implemented, so that you can feel your focus lock and your shutter fire, under your fingertips. Your chosen lens will breed a knowledge of the proximity you need to gain to your subject, without the necessity of the viewfinder. Intentions are rarely the same as the reality, but they allow you to take an educated stance from which to work.

In this picture the intentions were straightforward. The subject was spotted from a distance and, as he was sitting on the pavement, a change in format was used, as the camera was dropped to the side and fired from the hip. The use of a 50mm 1.4 meant a super fast shutter could be ensured and the frame would be filled almost confrontationally, giving quite striking results.
Know Your Subject
Sometimes you will be shooting with a model, a muse or a subject that is entirely aware of the camera. A subject’s willingness to be photographed will always change, from the very confident to the very timid. But a knowledge of this from the off is always a bonus on the part of the photographer.
There will always be a moment in between conscious and subconscious thought, reaction and recognition, where a subject is at their most genuine, their most real, even their most vulnerable. This fraction of a second is one you should always be ready to capture and can be achieved in a few ways.
1. Via Direct Interaction
Use your skills not only as a photographer, but as a friend, a husband, wife, or fellow human to strike up a conversation, embrace a topic and pre-empt a reaction. Whether this is a laugh, a moment of thought or curiosity, there will always be that moment where your subject engages with your question, reacts to your joke and cognitively links your words to their reply. Strike when you see this happen, and trust me, you will see it.
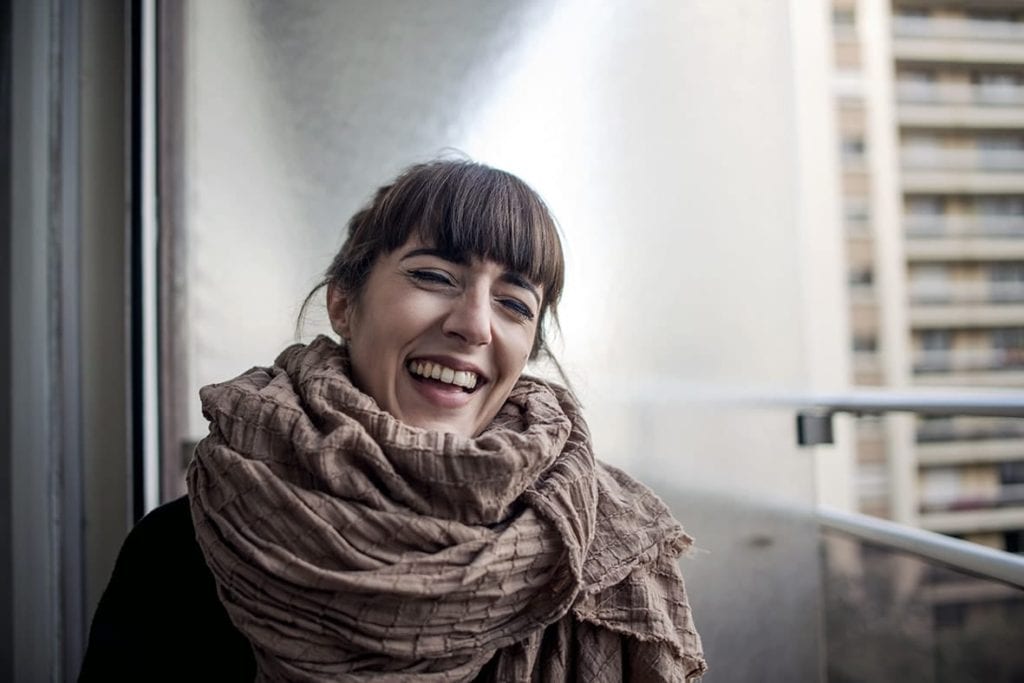
In this image, the subject is shot in a very brief moment of laughter. The genuine nature of the persona shines through here, as the image was captured right when the photographer intended it.
A passing joke or comment on the situation instantly relax the subject, and the resulting image is a warming example of this. It’s also nice to see the depth of field engage quite shallowly here, as that movement in and out of focus almost pulls us into the moment. We’ll discuss this in more detail later.
2. Via Instruction
If you have a relatively confident individual, then just instruct them. Communicate and use trial and error to get the results you need. It seems like such a simple concept, but it’s so easy to overlook when in the moment and shooting frantically.
You may have heard of the ‘looking down’ approach, whereby you ask your model to look down and then look up into the lens on the count of ‘three’. This is a very similar way of promoting that moment of ‘reality’ we talked about above.
The subject knows full well they are to be photographed, but that experience from looking at the floor to looking into the lens helps rid the subject’s mind of any conscious awareness towards the camera, if only fractionally.

In this image, the same subject is used, but stares down the lens very intently, almost intimidatingly so. Communication between subject and photographer took place this time.
The subject was asked to hold her cigarette to one side, tilt her head and look into the lens when the photographer intended on firing. In this instance, the subject was relatively comfortable in front of the lens. If your subject is less so, think about how you could adopt the approach above.
Composition
We can’t talk about portraiture and not speak of composition. But let’s not get bogged down in the rule of thirds or leading lines. If we’re to take what we’ve looked at so far, how might composition come into this equation? How might we consider our next steps?
If you know your intentions and your subject, you might want to bring a personality through naturally but also use a bold and ‘in your face’ composition technique. There’s nothing wrong with filling the frame and using incredibly wide apertures to pull focus from the bridge of a nose to a perfectly crisp iris.
You may want to consider the surrounding areas and pull back a little, having your subject look through the frame and into all that available space. This helps us read the frame as a satisfying and accomplished image, with no ‘dead space’ surrounding the subject.
Depth of Field
The same applies for your depth of field. We will always try to insinuate that a nice, shallow depth of field helps draw an eye in and creates an intimacy and solitude of the subject and to be honest, I would stand by this for most portraiture.
If you can play around with a 1.8 or 2.8 aperture, then you can have a lot of fun exploring this, and if it isn’t necessarily working for you, there’s always a more narrow approach. This is particularly important if your surroundings are perhaps integral to the portrait itself. In which case a wider composition and smaller aperture can help. Just be careful not to let that depth of field hinder your subject matter.
Here are a few helpful tips on what not to do.
Black and White for the Sake of it.
Effective portraiture relies on an intelligent use of light. Whether this is flash driven, in the studio or using natural light sources, you need to be aware of how that light is cast upon your subject and this in itself will pre-determine whether or not you should be considering black and white photography.
Sometimes a use of colour is far more effective, as the hues, saturation and vibrancies can help an image pop. This is not the same as a tonal value. Tones are created solely via light and a change in light. Be careful not to mix these two up, as the intensity of colour will often let you down regarding its tonal value, and the human brain is not instantly able to deconstruct this.
Makeshift Backdrops
You may want to play around with a home studio setup, but it’s far too common occurrence that students assume this is simply where portraiture starts. Before they know it they’ve shed their scene of any real contextual interest by hanging black paper or a bed sheet behind a subject. Remember, with a shallow depth of field, a background filled with shape, form and a change in tone and colour makes for a far more encapsulating environment in which to sit your muse.
Artificial Lighting and Unnecessary Flash
The makeshift background will usually go hand in hand with stripping the scene of any natural light and turning to lamp light or unnecessary flash. Pop-up flashes and lamp light can be harsh, glaring and detract any subtlety in tone and colour from the subject. Artificial lamp light especially will leave you with an abundance of orange and warm hues that are hard to counteract in the edit.
So, there’s quite an in-depth look at portraiture and one that hopefully has shed some light on how simple it can be. It’s mostly an appreciation for your light source and of course, an appreciation for your subject.
Good luck for this months project!
Not a student yet? Enrol on a photography course today and start your new career path with IOP.