High Dynamic Range or HDR photography is a technique that often causes confusion so, here are some HDR Photography Hints and Tips.
Not be confused with HDR toning in the editing process, HDR is a process of shooting in which several different exposures of the same image are merged to give a much greater depth of tonal value. This, in turn, means we can go on to edit the image and push it far further regarding its digital detail, than we could if it were simply a RAW file, straight from the camera.
In this month’s article, we’re going to explore the basic process of creating an HDR image, when you should consider HDR and what not to do.
What should I be looking for?
Light
An HDR image can be used in any situation, for practically any scene, but it is probably best utilised within the realm of landscape photography and particularly for scenes of dramatic, contrasting exposures. It could be a twilight cityscape scene or a killer sunset. Perhaps it’s vivid sunlight piercing it’s way through a dimly lit shed or abandoned building. It might even be as simple as the first rays of morning light through your bedroom window. Each of these scenarios has its challenges, but the one recurring challenge is how best to expose the image, to show the difference in darks and lights. Focus on your light, and you silhouette the entire scene. Concentrate on the darks, and your brights are completely blown out. Even focussing on mid-tone can bring a dull, uninteresting exposure value to the entire image. This is precisely where HDR comes into play.
Detail and Clarity
Since HDR is essentially a process involving layering of high-resolution RAW images. It stands to reason that it can also produce incredible detail and clarity within its finished state. Imagine a field of lush green grass or a forest canopy. You might even be shooting the clutter inside the aforementioned shed or the ornate ironwork and textured rust on the garden gate. These all have the ability to pack a punch when processed as HDR.
If your proposed scene contained either of the above, then it’s well worth having a good go at HDR photography. If it contains both, then there are no excuses!
How Do I Shoot HDR
The process of shooting HDR, if you’ve never done it before, is very simple. The first stage of an HDR image is collating RAW shots of varying exposures, which will then go towards being merged. This process is called bracketing.
• AUTO EXPOSURE BRACKETING (AEB)
All DSLR cameras have the AEB function. In this function, the camera will take one image which it decides has the best regarding exposure value, based on its metering of the scene and will then automatically shoot an image either side of that image – both underexposed and overexposed – based on the number of stops you select. This can be as low as 0.5 or as high as around 2 or 3.
• EXPOSURE COMPENSATION
If you want a little more flexibility with your stops and perhaps more images to merge later, you might want to try using your exposure compensation. This will allow you to manually change your exposure between each frame and more often than not preview this before shooting. It’s a little more hands-on and requires an organised approach, however. It’s often easy to get mixed up in how many shots you’ve taken or focus something differently, even incur movement between shots by constantly changing the exposure and shooting. These aren’t problems you would get using the AEB mode, so it’s best to distinguish between them and which is more suited to your style of shooting, and your scene before you choose to shoot.
Preparation is Key
What is perhaps more important and often overlooked is the process of setting up and preparation. Here, there are some different factors that you need to remember.
Use a tripod or a steady surface
Since we’re shooting more than one image, it’s a good idea to shoot on a tripod or a steady surface. The more identical each exposure is, the ‘ghosting’ there is in the merged HDR. It doesn’t matter how fast the shutter is here, you can end up with three crisp exposures, but a fraction of a milometer one way or the other can make a big difference when merging.
Notice Movement
If you’re shooting HDR then your likely to be shooting outdoors. Keep an eye on things such as wildlife, people, passing cars of cyclists. You may even want to pick up on the weather, as strong winds or even light breezes can disturb branches, grass, bushes, causing a general lack of clarity and that pin sharp detail we’re looking for once the images are merged.
Changing Light Condition
This is something you should quite simply, always be aware of, but particularly when using AEB for HDR. A change in light can be the difference between the stop you selected on your bracketing mode keeping your bracketed images well under the point of peaking or going over or underexposed. Remember, though your bracketed images will be more and less exposed than your initial shot, you don’t want either going too far. An overexposed image is not usable when merging. And the underexposed shot is pointless because, as we know, there is very little detail on a flat, black, solid tone.
Merging your HDR
There are various dedicated programs to HDR photography, and many of you will be familiar with different ones. These can all give you the opportunity to both merge and then go on to edit your HDR image. However, in this instance, I’m going to run you through the process in Adobe Lightroom and Photoshop.
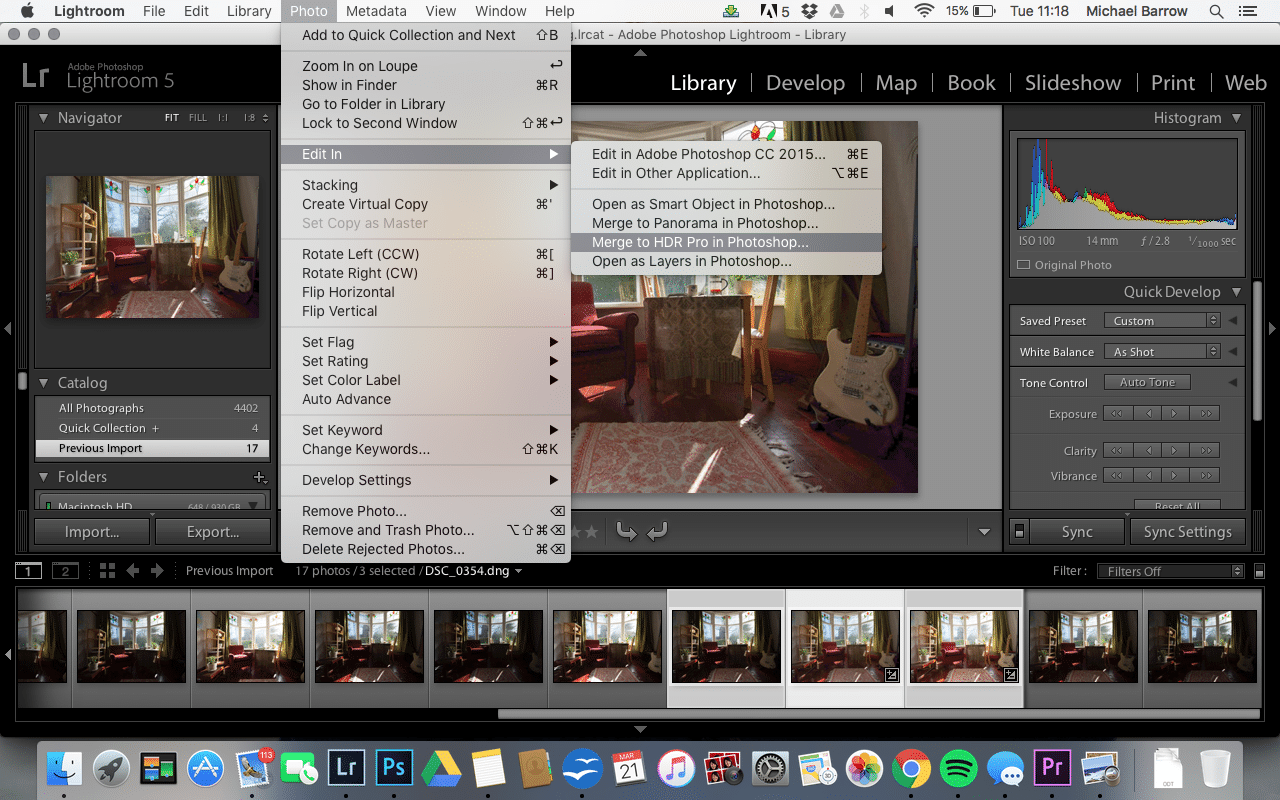
1. Firstly, load your shoot into LR and select your 3 (or more) bracketed images. Here I’ve used a test shoot in my living room. You can see how there are varying degrees of light and shade and also certain amounts of detail that can be helped along in HDR. Once you’ve selected the images which you think contain the most appropriate change in exposure, simply select Photo>Edit in…>Merge to HDR Pro in Photoshop. It’s as simple as that! Photoshop will open on command, and the merging process will begin for you.
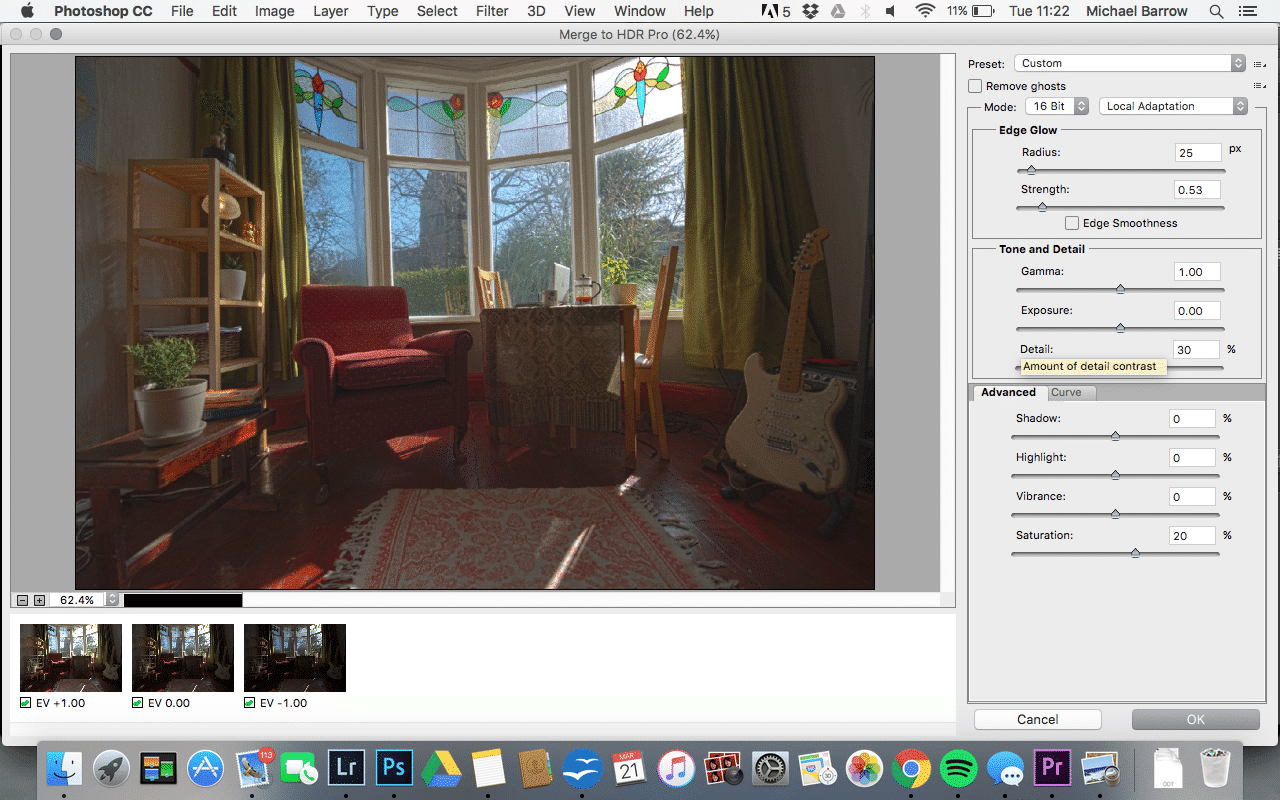
2. Once finished you will see an edit screen which is similar to that of HDR toning, in your Filters setting. From here you can play around with the clarity, gamma, light levels, etc. It’s important that you are very careful if you do adjust anything here. Remember that the level of detail is far great in your merged image and so a slight adjustment in RAW can have a great effect here. Also, notice that there is a selection tool for removing ‘Ghosts’ at the top of the edit screen. This will help with anything that has moved between shots or movement you have incurred with the camera. Bear in mind, the detail we mention above such as grass, leaves, etc. cannot be completely edited out if movement occurs, so it’s still very important you get your exposures as identical as possible. You can also change your Bit Rate here. 32, will give you far greater control but will limit you to certain editing techniques. I tend to prefer 16 Bit as we can then open in PS and edit with the techniques I am familiar and comfortable with generally but do explore 32 Bit also. You can still edit using the Camera Raw filter if this is your preferred method of editing.
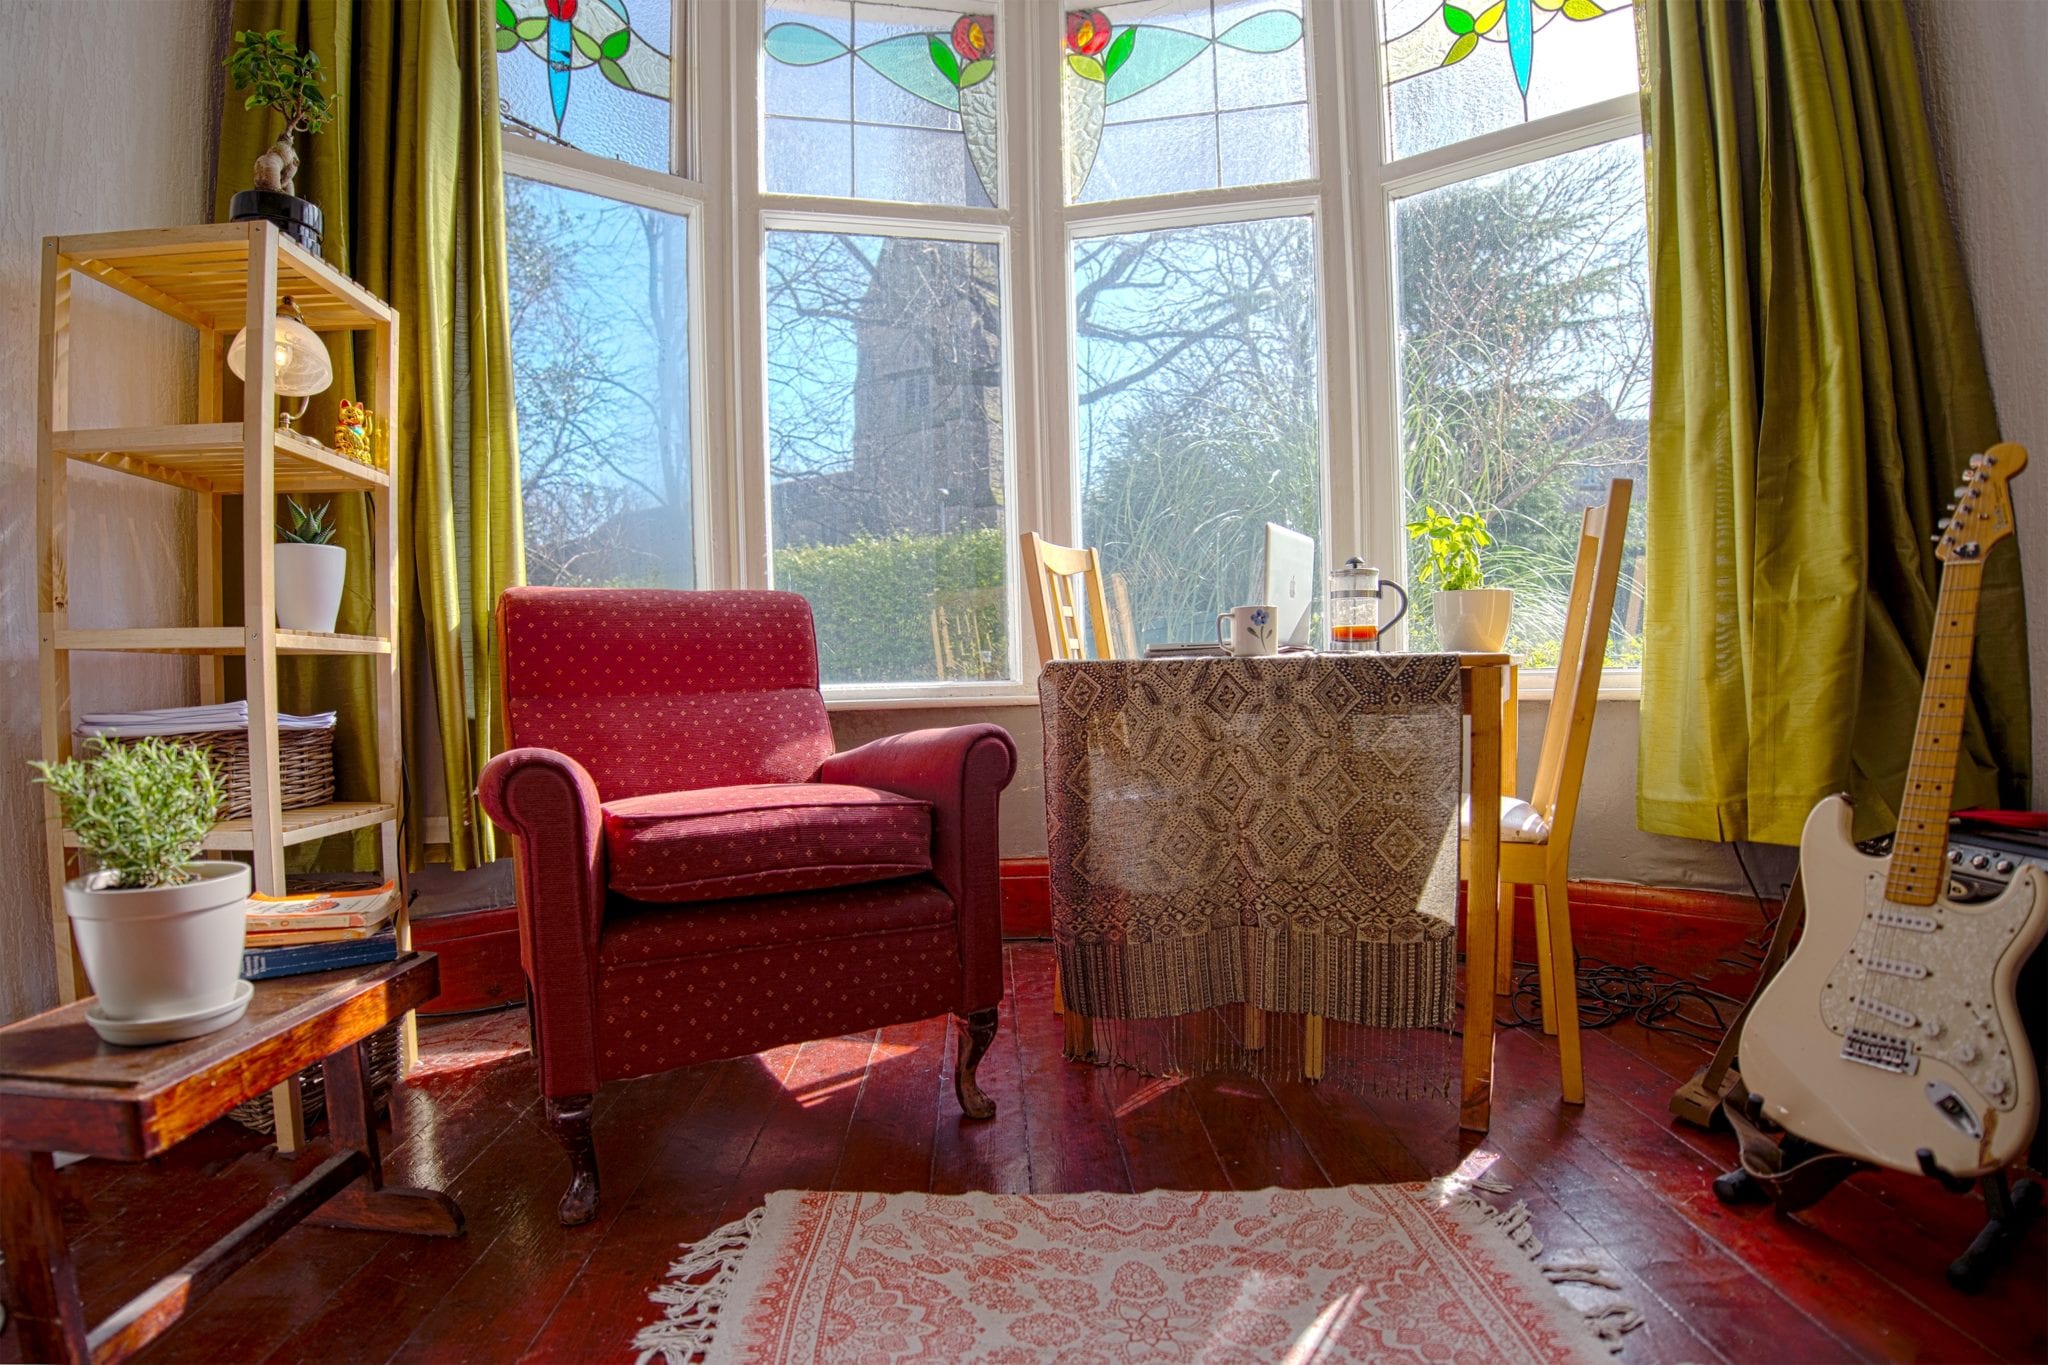
3. Once open in PS you can then go on to edit as you please until your happy. You can see, as a rough example in the image above, just how much clarity and vibrancy is punches into the tones, colours and textures of the image. I shot this very quickly on an aperture of 2.8. If you want that detail running throughout your image, get that tripod set up and narrow your aperture accordingly.
So there you have it. A basic guide to shooting HDR. It can be a little daunting and even challenging in places, but it’s also a great learning curve, even if it’s not necessarily your thing. The next time you’re out shooting, just bracket some shots and see what you can do when you get back home.
Find out about this and more in an IOP® online photography course.